

Jenkins and CI/CD it’s a great idea! let’s see why…
Jenkins and CI/CD, but what is Jenkins?
Jenkins is an open-source server that can automate all sorts of tasks whether in local or cloud (Docker) machines. It’s widely used to create Continuous Integration and Continuous Delivery flows (CI/CD).
What is CI/CD?
CONTINUOUS INTEGRATION (CI)
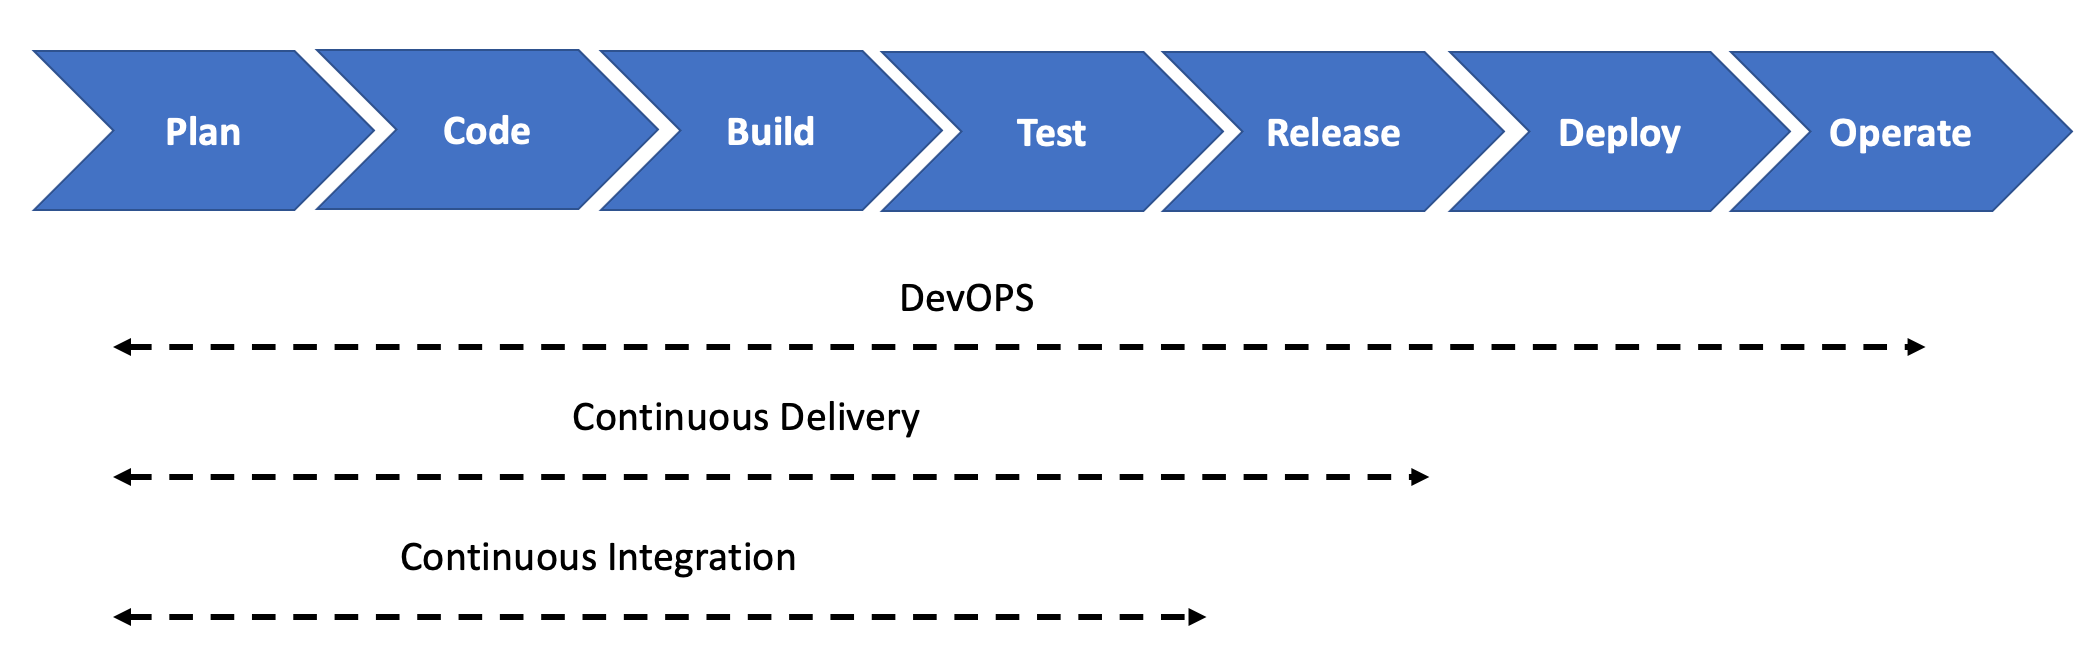
Continuous integration is the first step to Devops’s world (I’ll touch that matter later), basically is the process from when a Developer merges into a master branch new changes to the Run of the Automated Tests. To be totally automated, this process needs that the app’s building tasks, in the case of mobile apps, the deployment (locally or in a personal server) goes to a physical or emulator/simulator device.
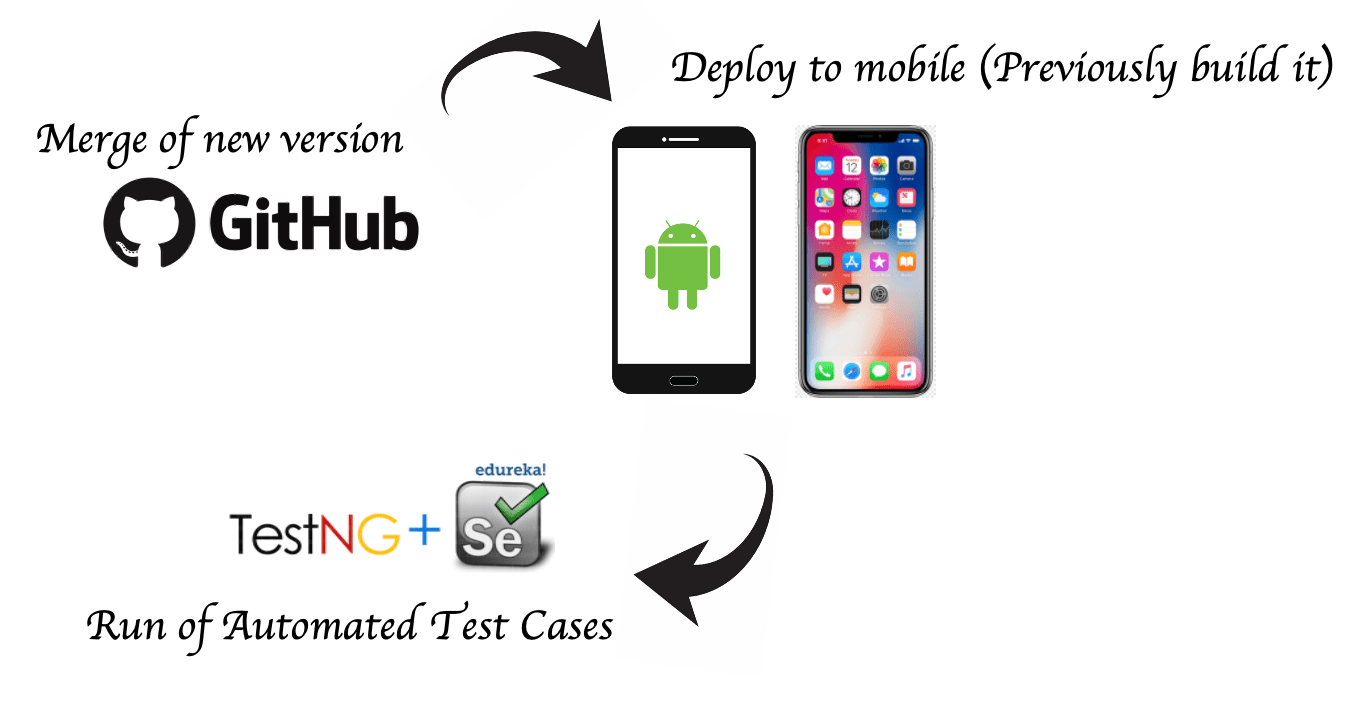
CONTINUOUS DELIVERY (CD)
Continuous delivery takes one more step, that is deploy this new version of the app but to a “Testing Environment” such as Staging or UAT environments.
There’s another term, CONTINUOUS DEPLOYMENT, this is usually confused with Continuous Delivery, but it’s slightly different because it’s also deployment of the app but to “Production Environment” where clients can have access to the new app. All these processes need to be automated to be able to call it Continuous Deployment.

What is Devops?
Jenkins and CI/CD is good, but we also need understand somethings about Devops.
In short terms, DevOps it’s the management of all this process including the DEV side, just like technical implementation to the IT tools to create, maintain and apply it.
Enlarge
To create a Continuous Integration (CI) environment we need to install Jenkins. Take a look at the next steps:
Step 1.
Download Jenkins from the official page, easy 🙂
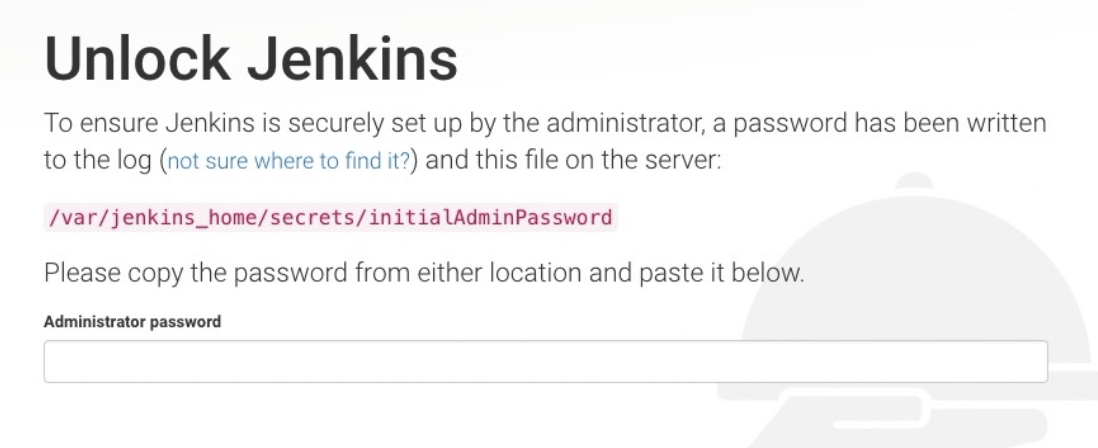
Step 2.
Once installed go to “http//localhost:8080/”, the first time a message like this will appear, so search the key in your computer under “/Users/username/.jenkins/secrets/initialAdminPassword”.
Enlarge
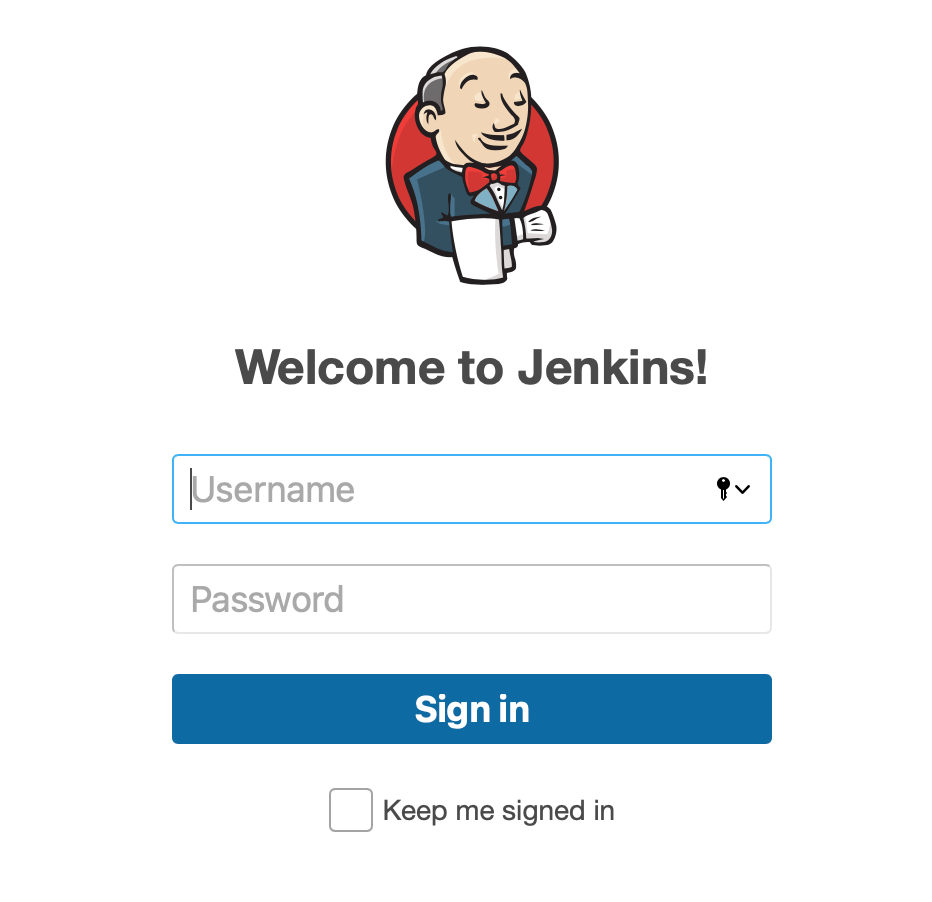
Step 3
Once the password has been entered, Jenkins will ask you to create another admin password and then you’ll see the main page of Jenkins.
Enlarge
Step 4
Now, let’s go to the Code Repository, in this case, I’ll use Github, the process can change in some configurations with other repositories but not too much.
Step 5
The App should be already uploaded to a Github Repository, if you don’t know how to do this, you can check it out how in https://internet80.com/blog/upload-project-to-github/
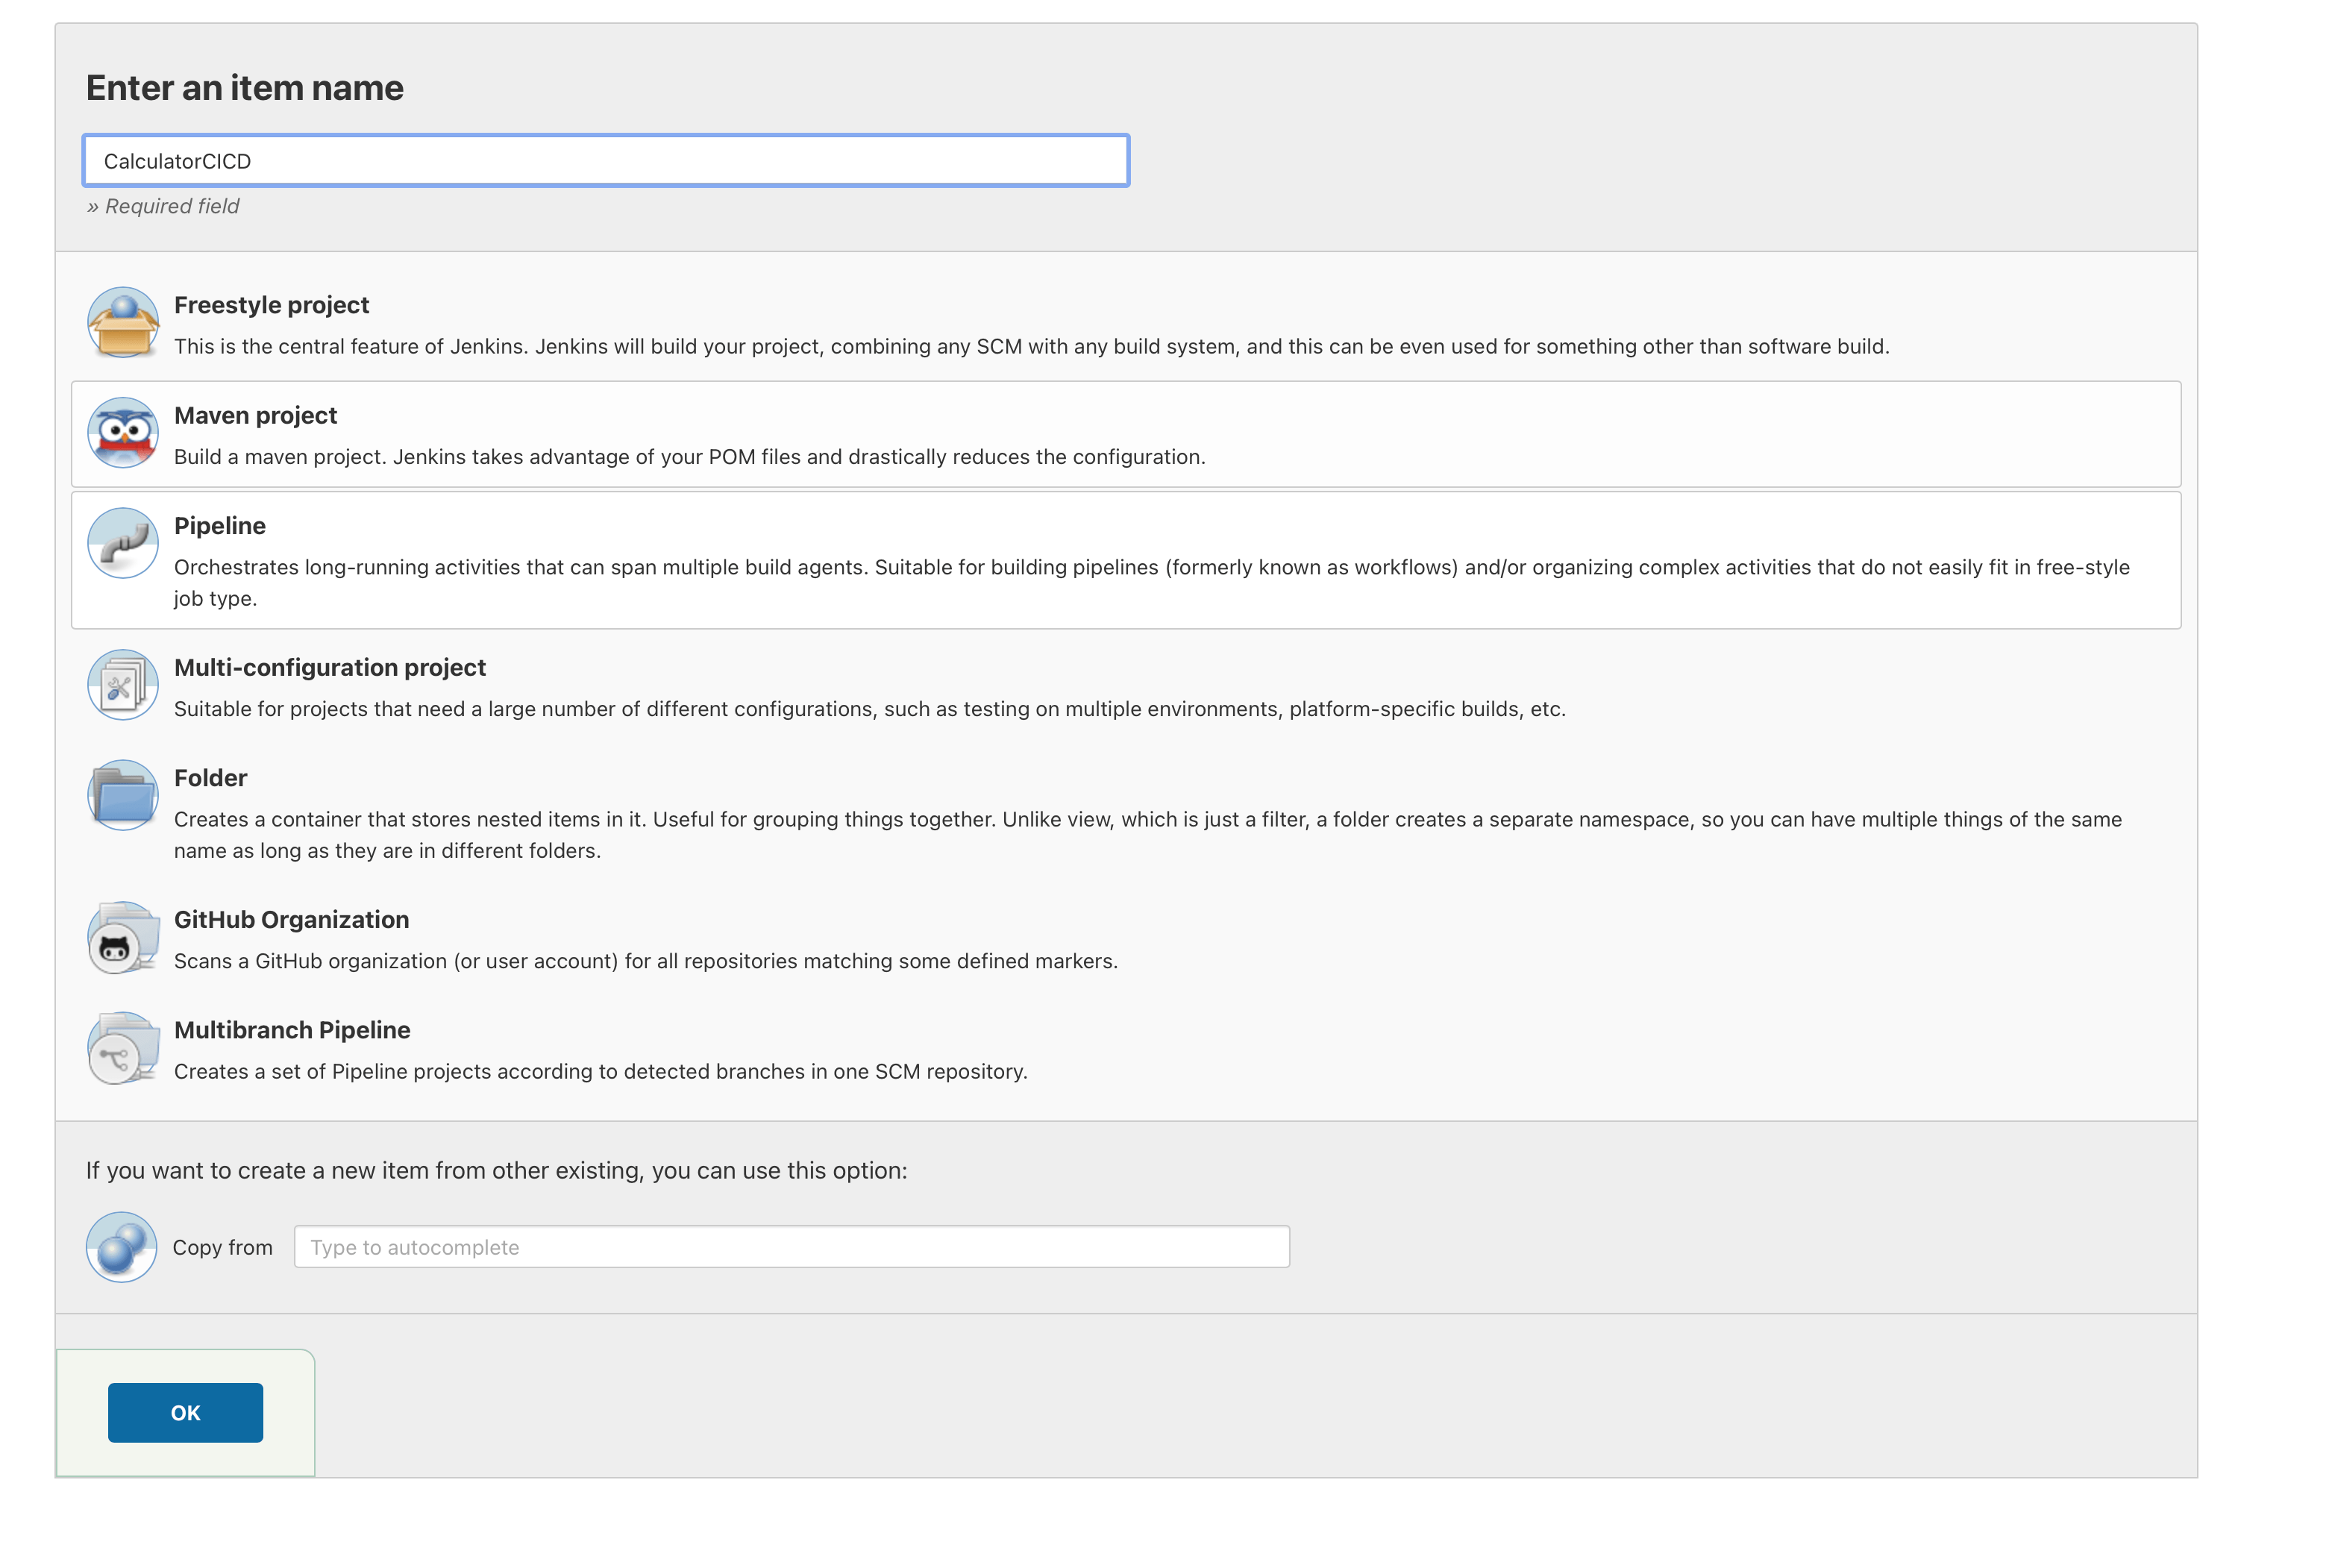
Create in Jenkins a “New Item” as “Pipeline”, in this case, it’s called “CalculatorCICD“.
Enlarge
Enlarge
Step 6
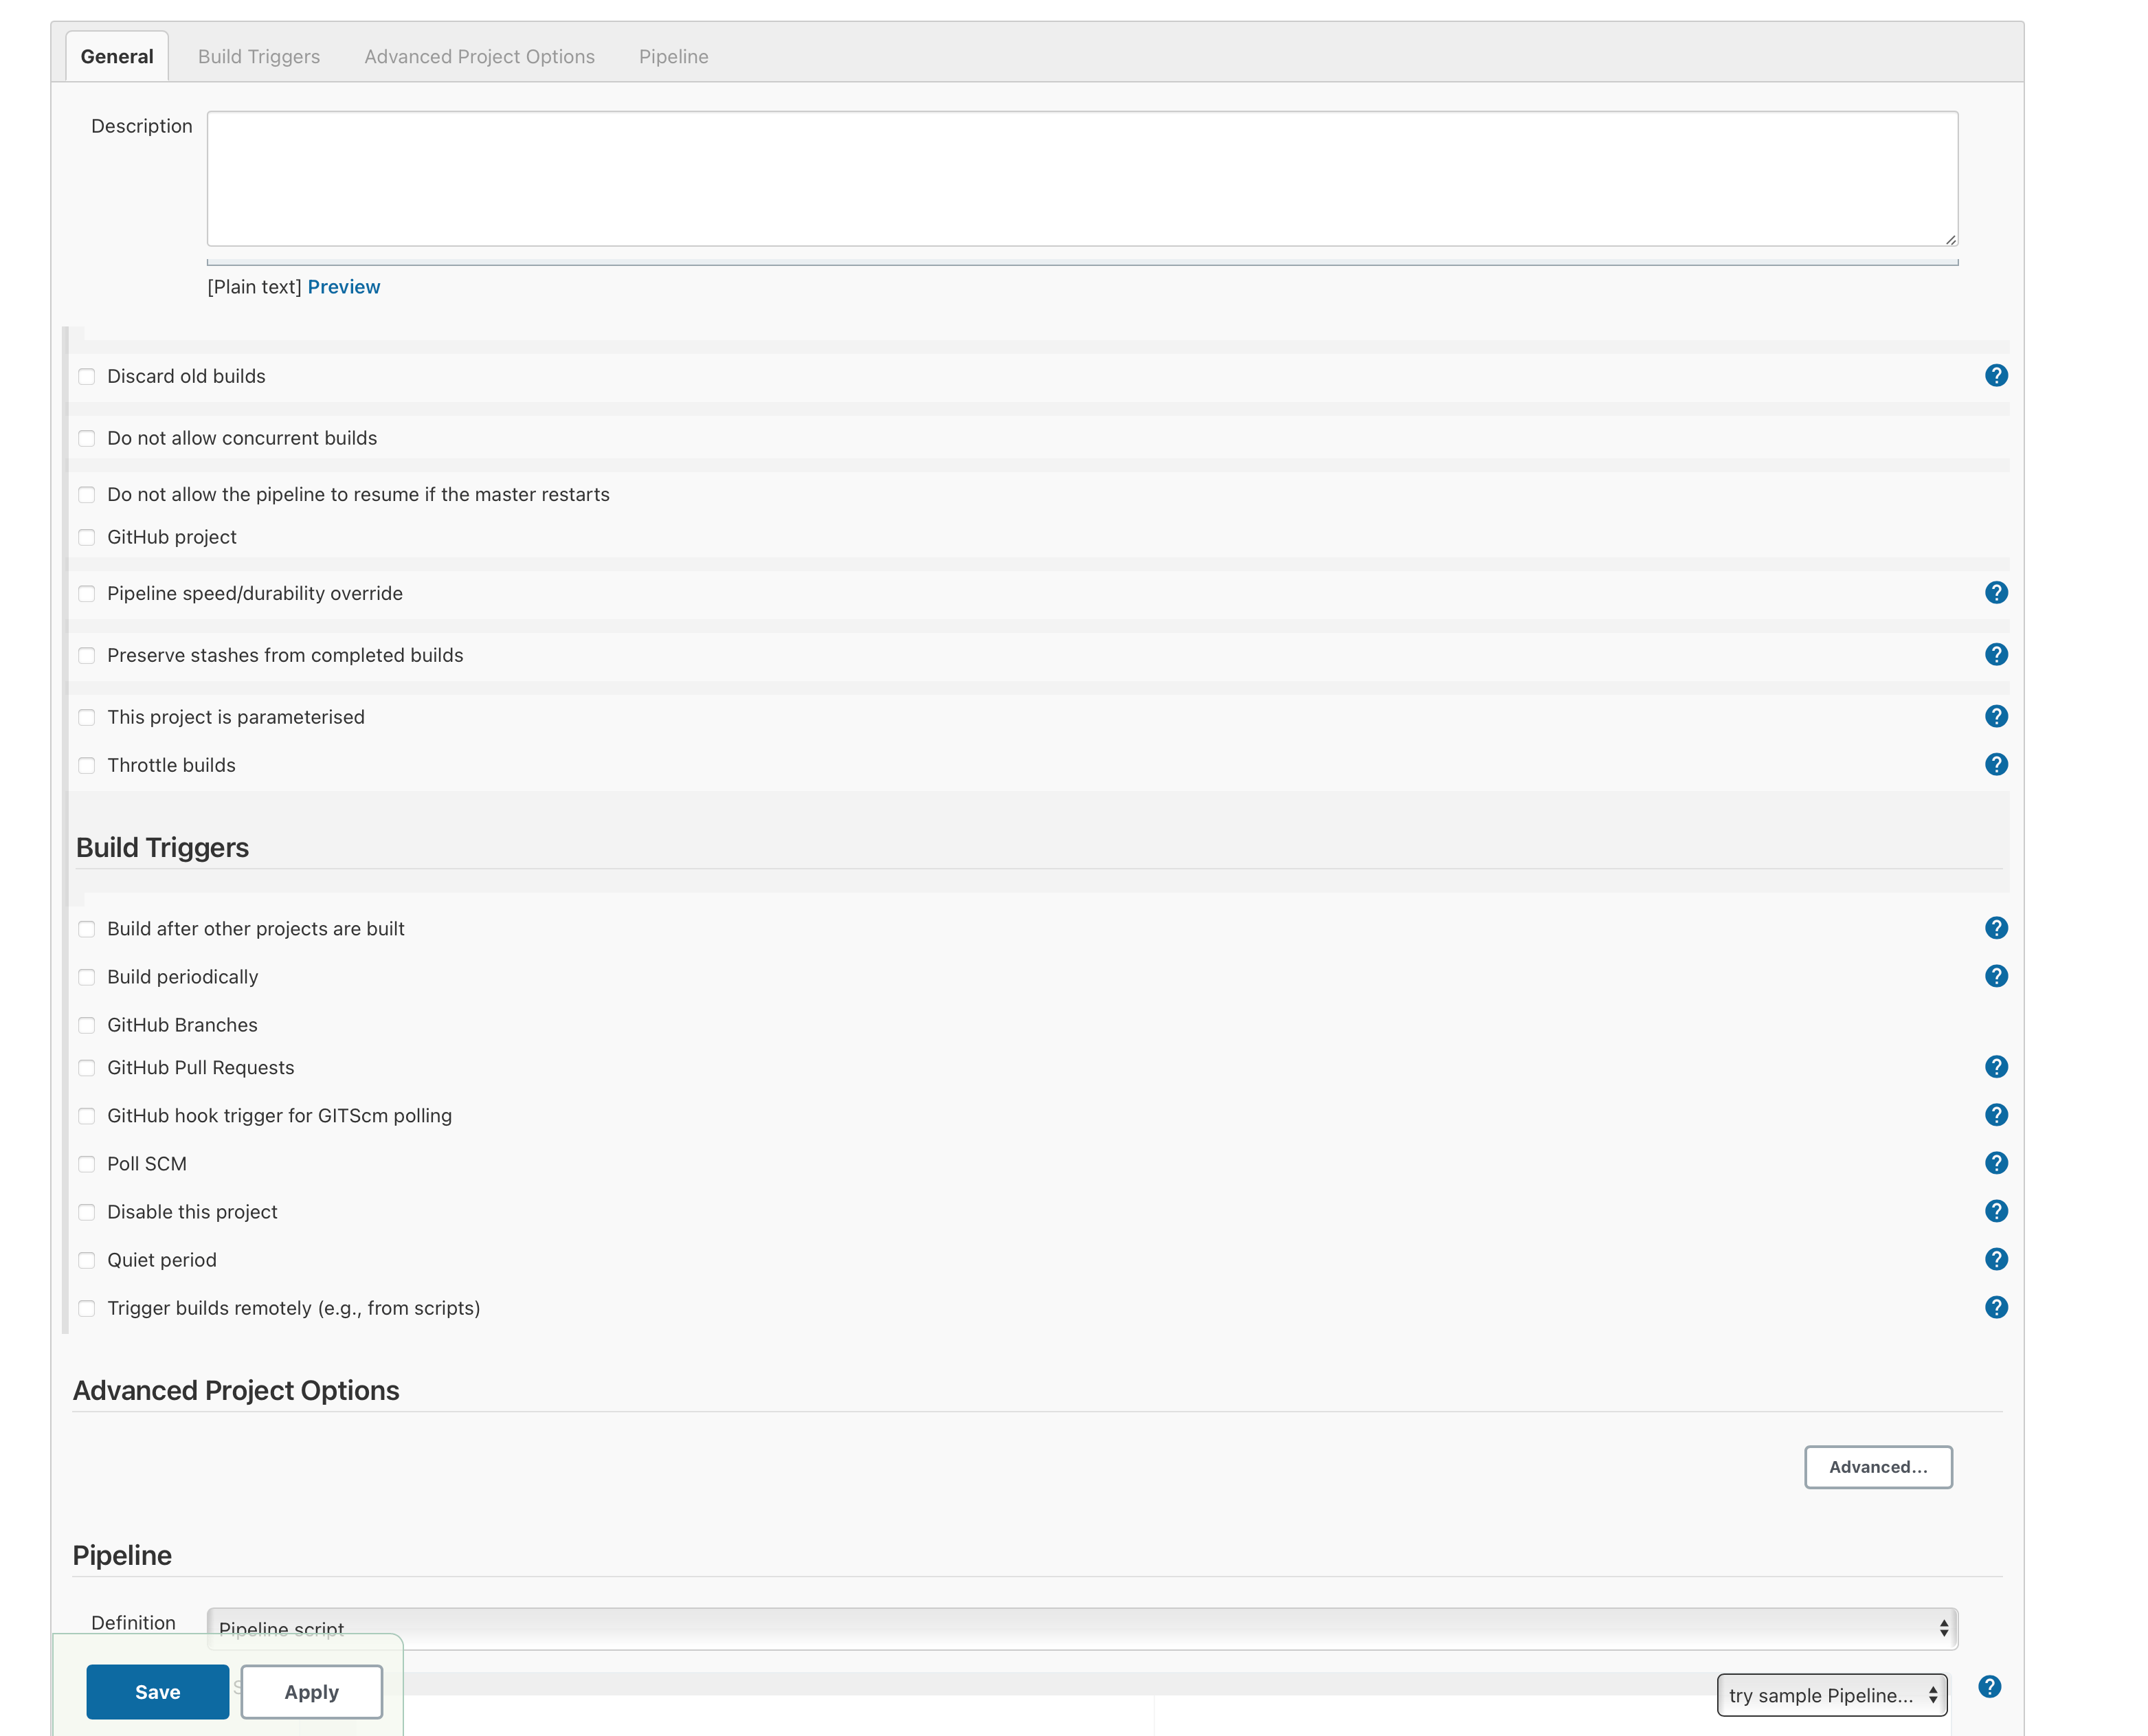
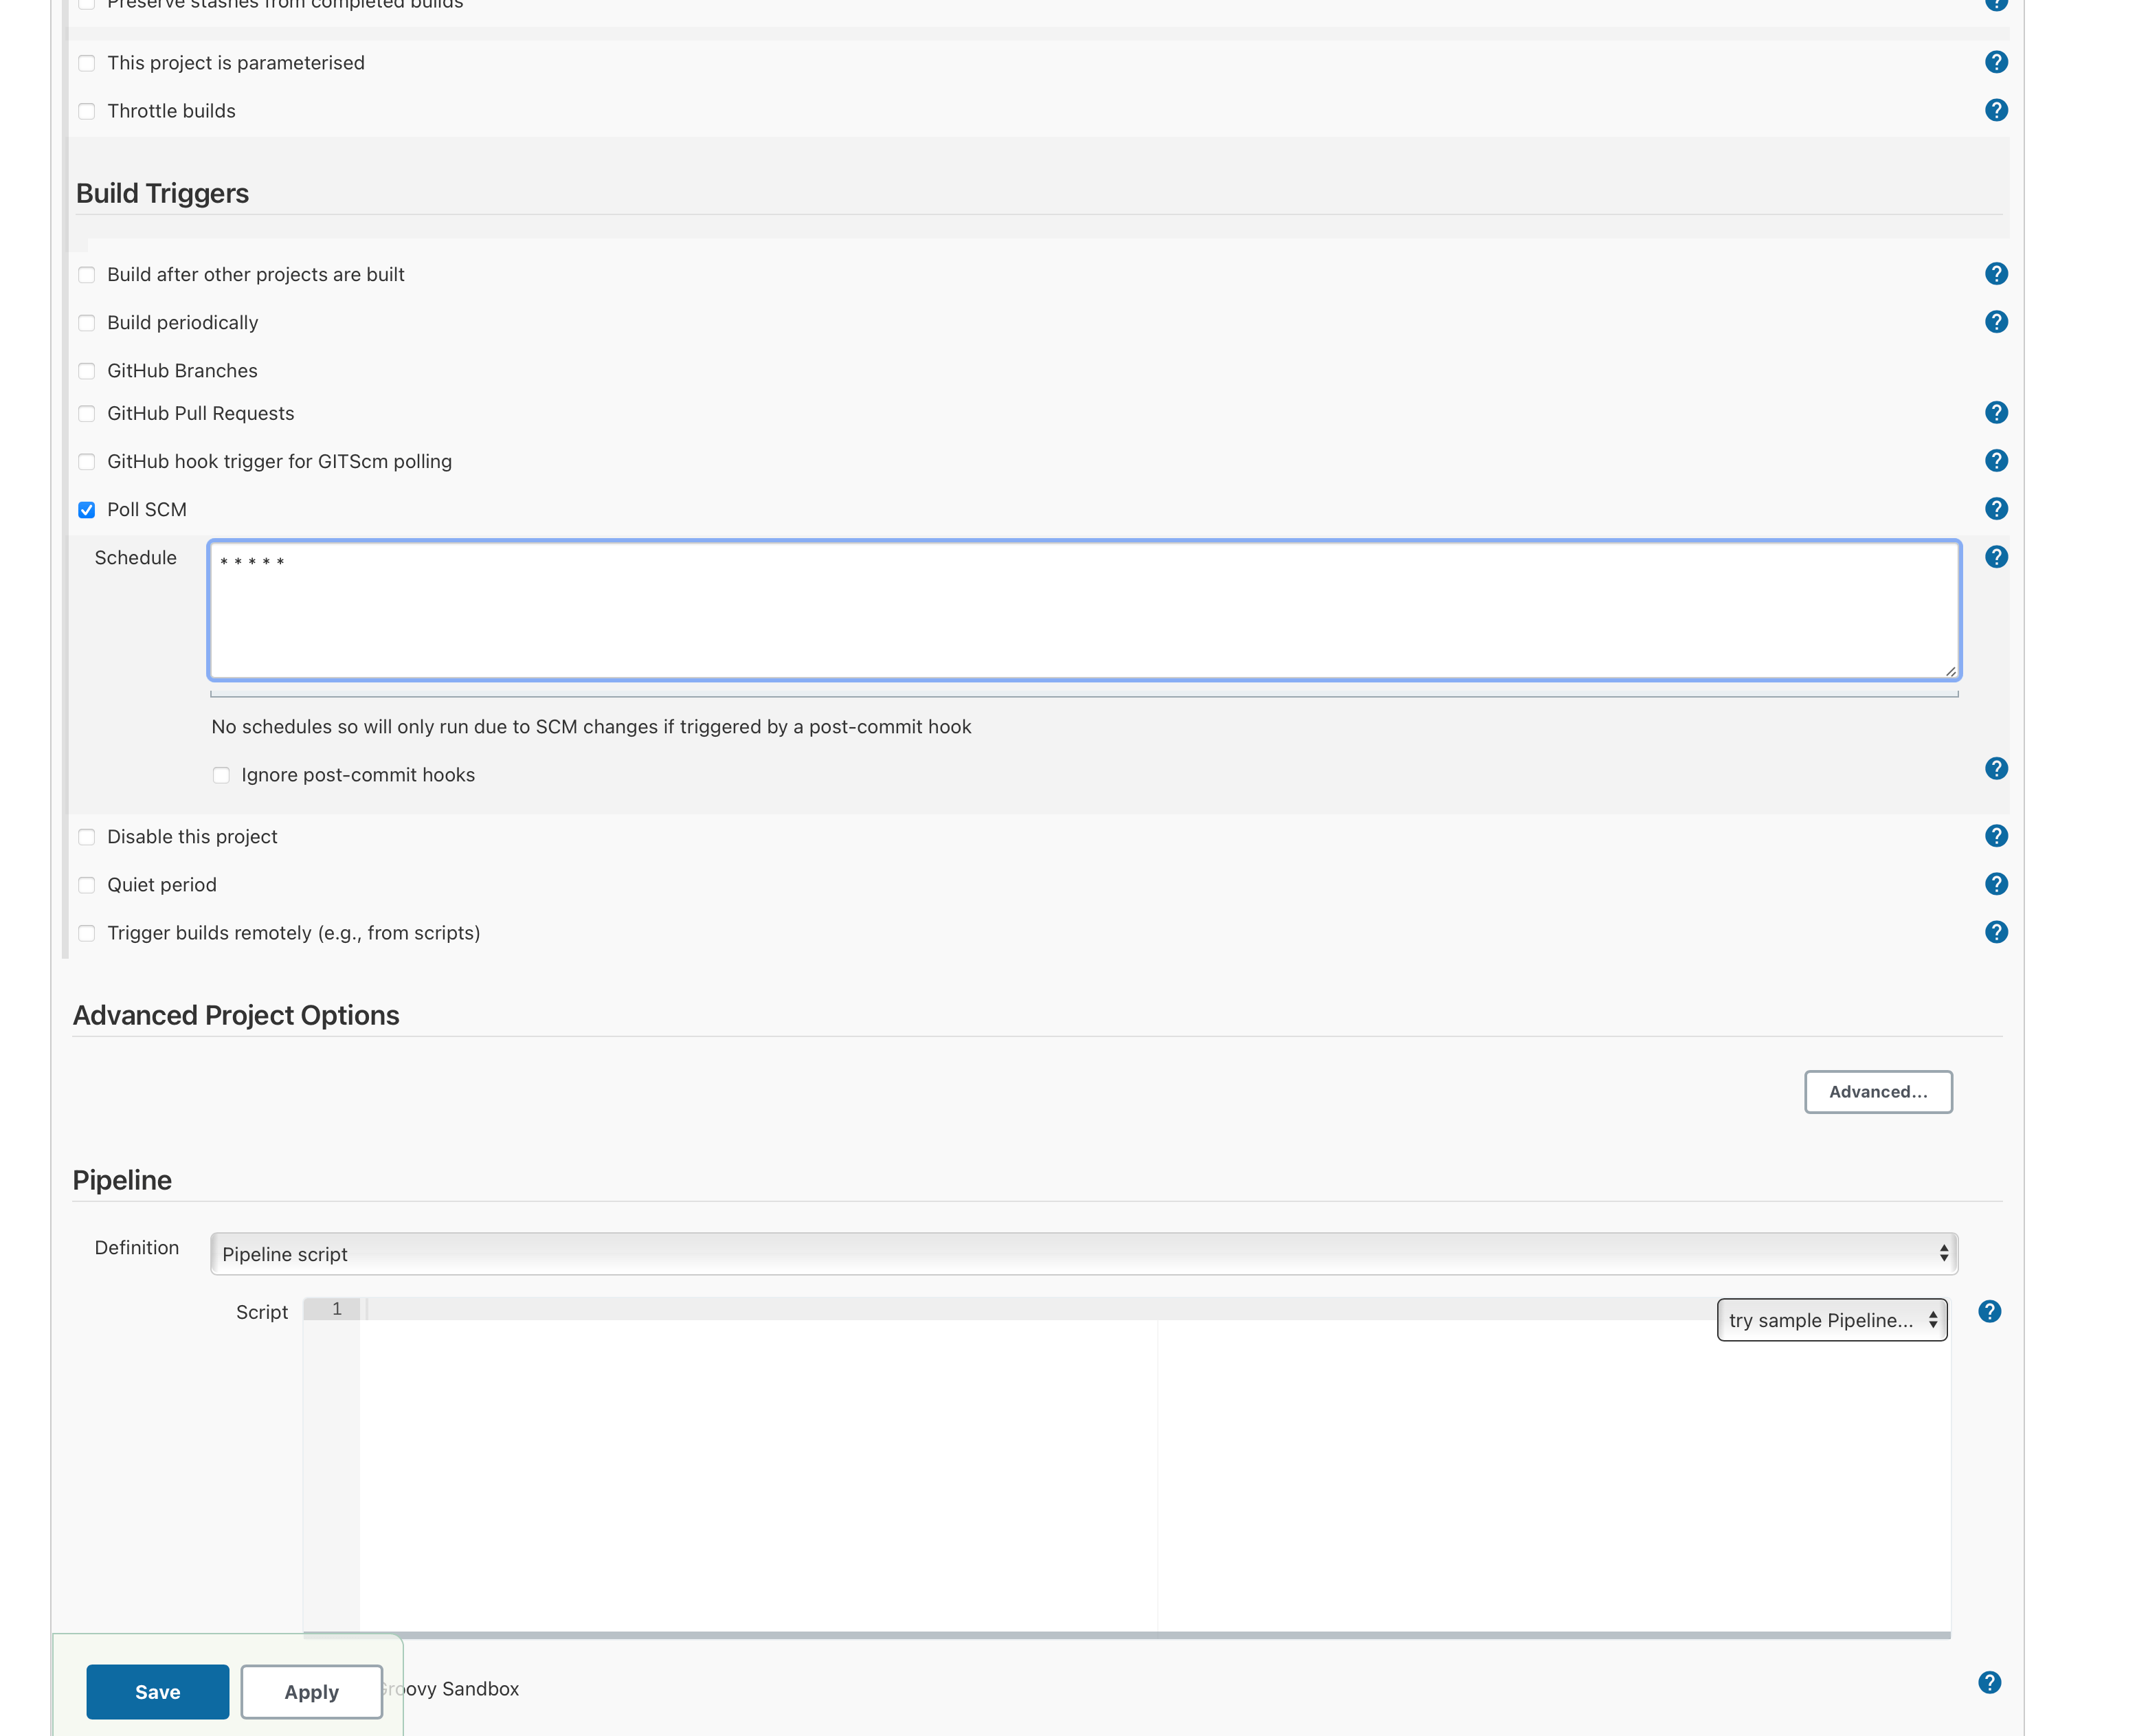
To tell Jenkins to run the pipeline every time there’s a new commit in the repo where the CalculatorApp’s code resides, add in the section “Build Triggers” -> “Poll SCM”, add “* * * * *”.
Enlarge
Step 7
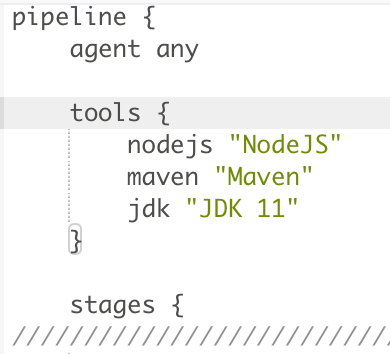
Now let’s create our first pipeline, to do this, we need to set the flow we’re going to follow. It’s important to mention that Pipelines in Jenkins have a main structure divided by “stages” each stage does a part of the CI/CD process. In this example we’re going to have 4 main stages “Checkout”, “Build”, “Deploy” and “Testing”.
- We need the “Checkout – Github” section to connect to Github Repo to download the code in our Jenkins workspace.
- The “Build Process”, is where once we have the last version of the code copied in our Jenkins workspace, we need to build the app.
- The “Deploy to Emulator”, in here we’re going to deploy the app to an emulator in Android (If you prefer you can deploy it to a physical device too).
- Finally, the last stage is to run our Automated Test Cases, the “Testing” stage.
Step 7.1
Checkout – Github
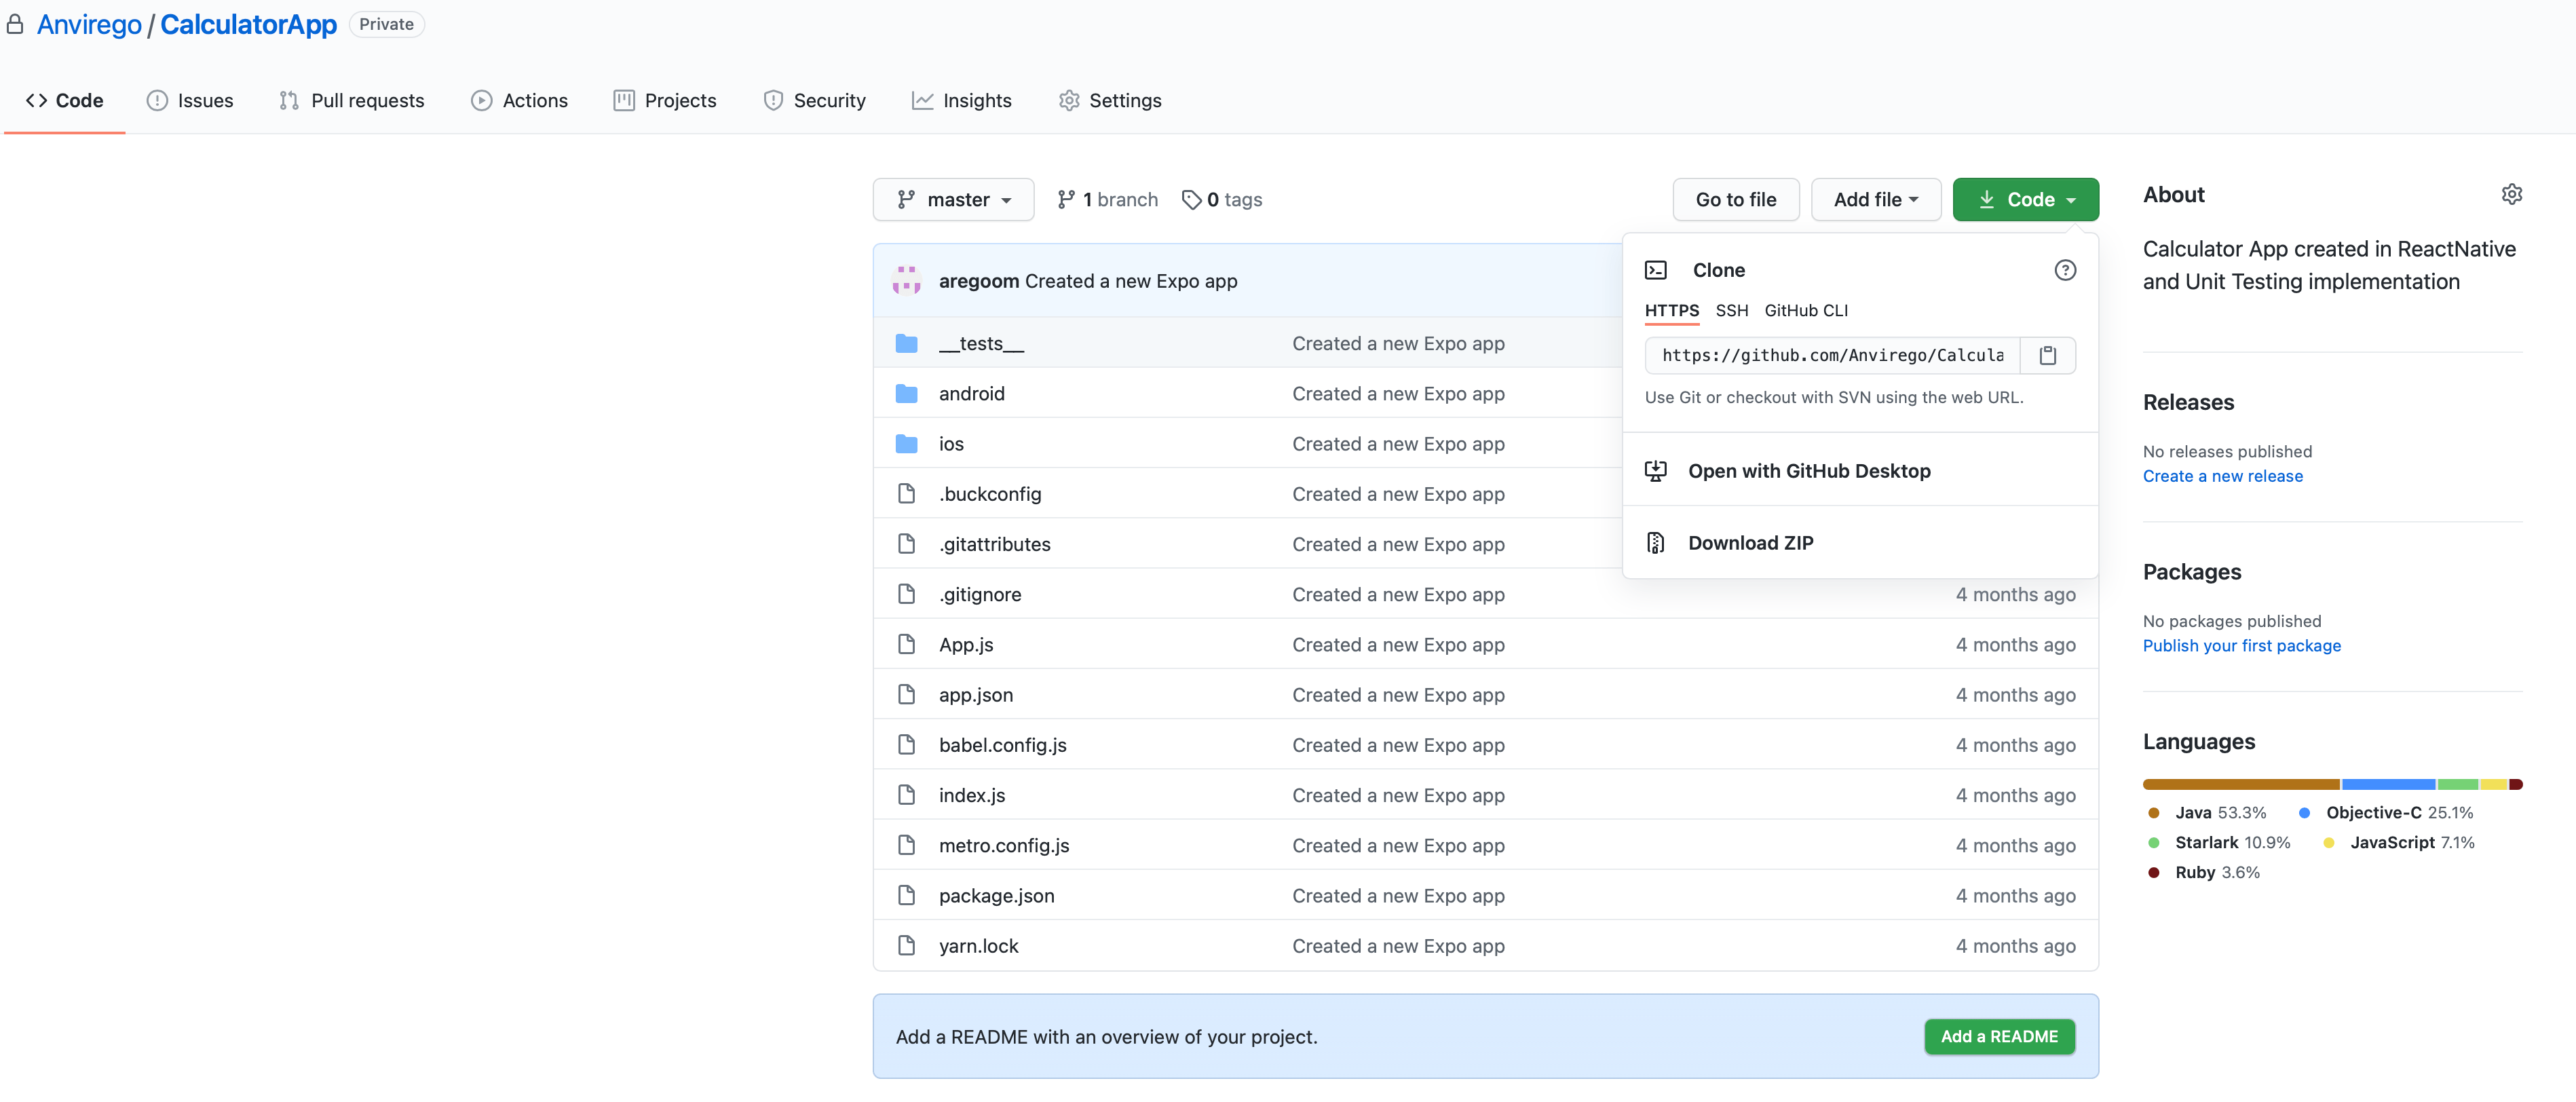
- Get the URL of the Repo in Github. “https://github.com/Anvirego/CalculatorApp.git”
Enlarge
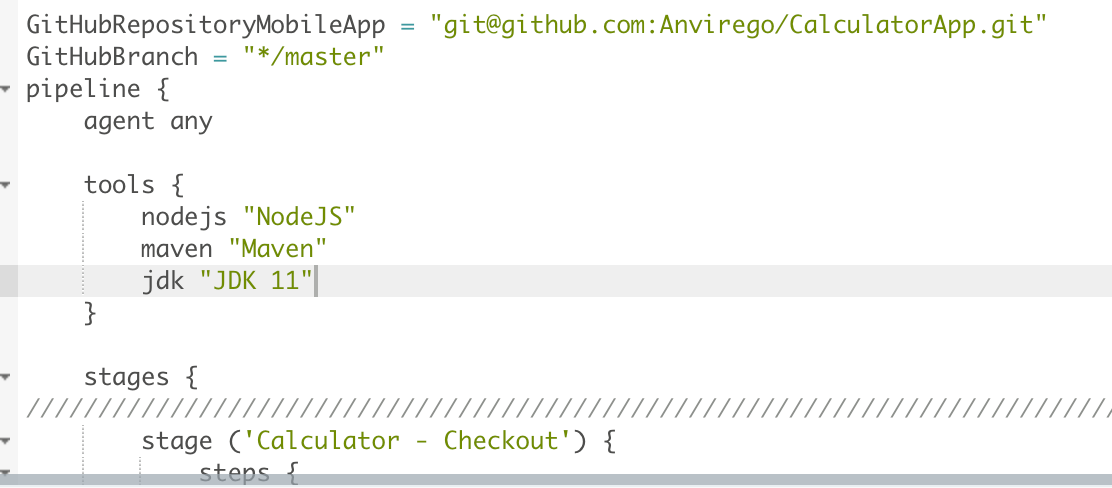
- To parametric our pipeline we’re going to define “GitHubRepositoryMobileApp” to pass the URL of the Github repo and “GithubBranch”.
Enlarge
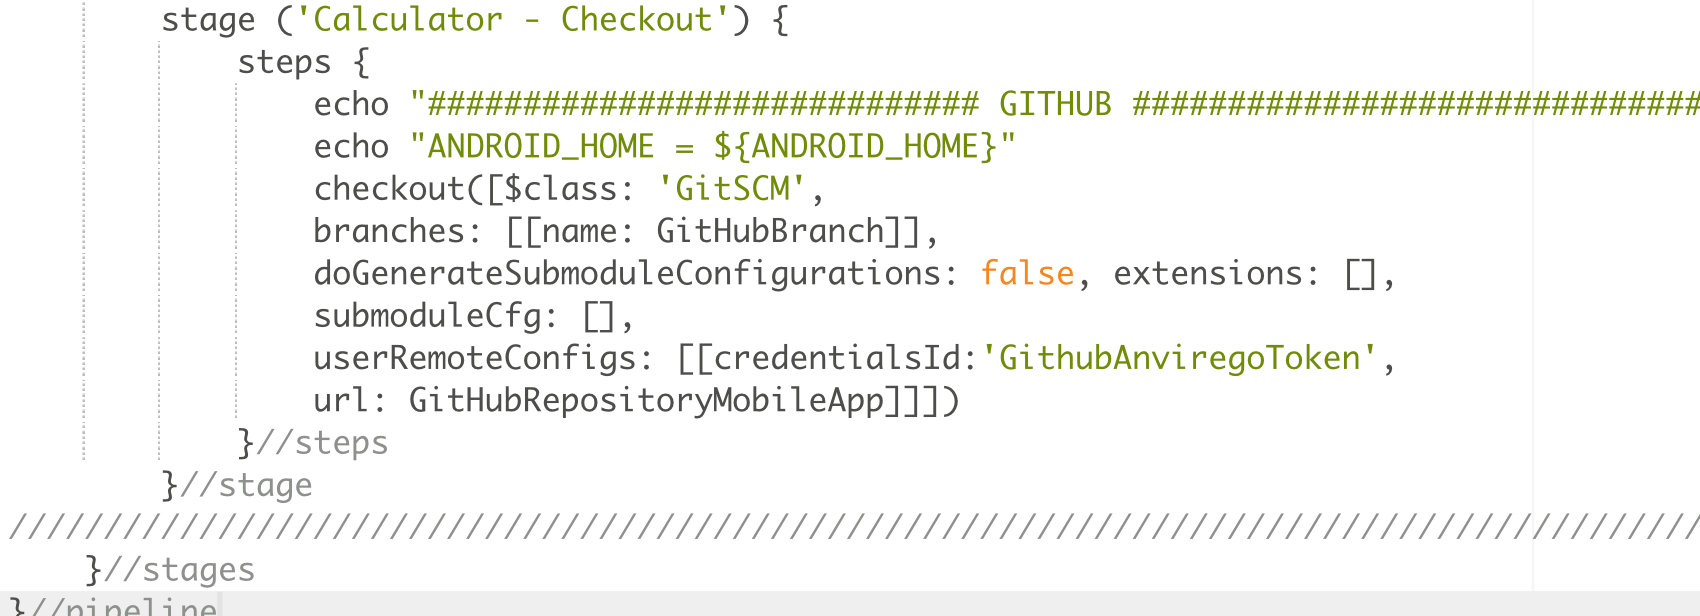
- Let define the logic under stage (‘Calculator – Checkout’). To authenticate with Jenkins and Github we’re using a “Personal Token” so the repo has to be Public, if you want to have access to a Private repo, you will need to create an SSH Credential in Github. For further information you can go to this link https://docs.github.com/en/authentication/connecting-to-github-with-ssh.
Enlarge
Step 7.2
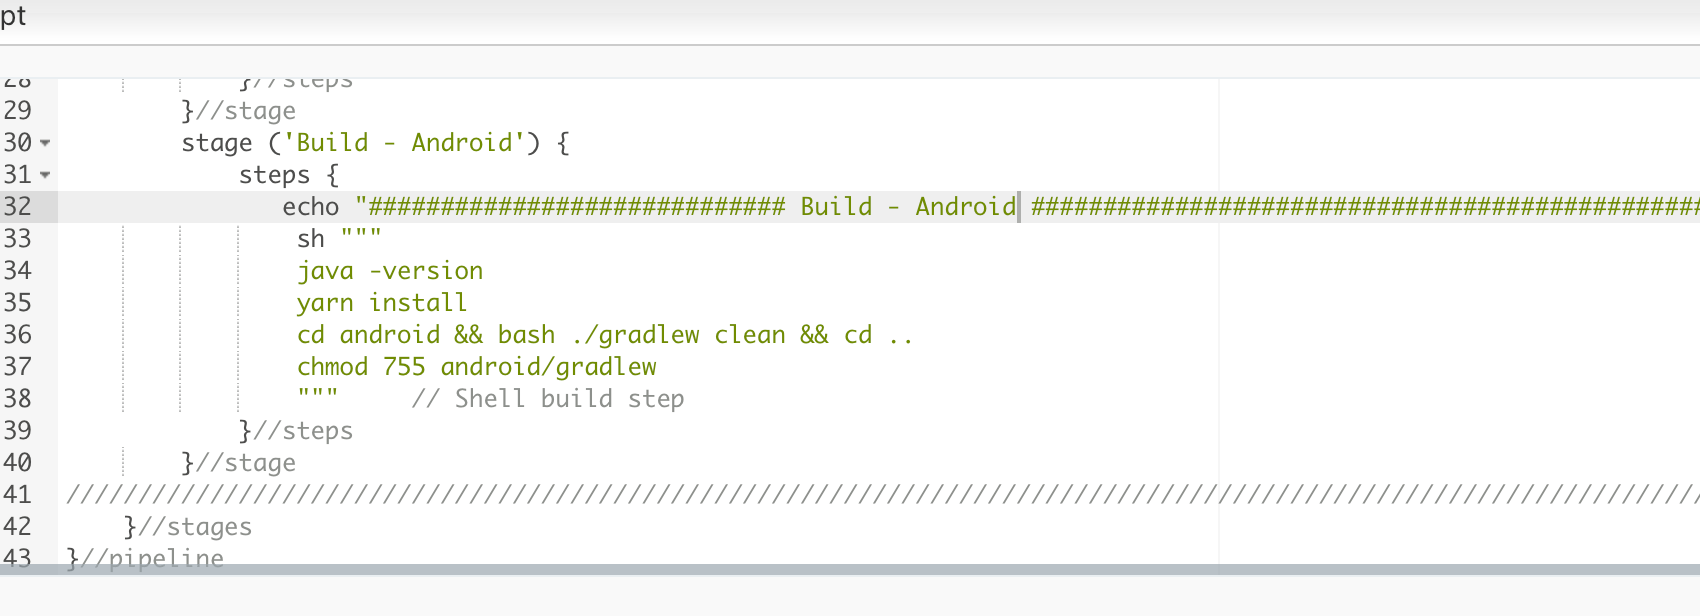
Build – Android
- In the next stage, we need to build the app, for that, we have to follow the steps used to build the app from command.
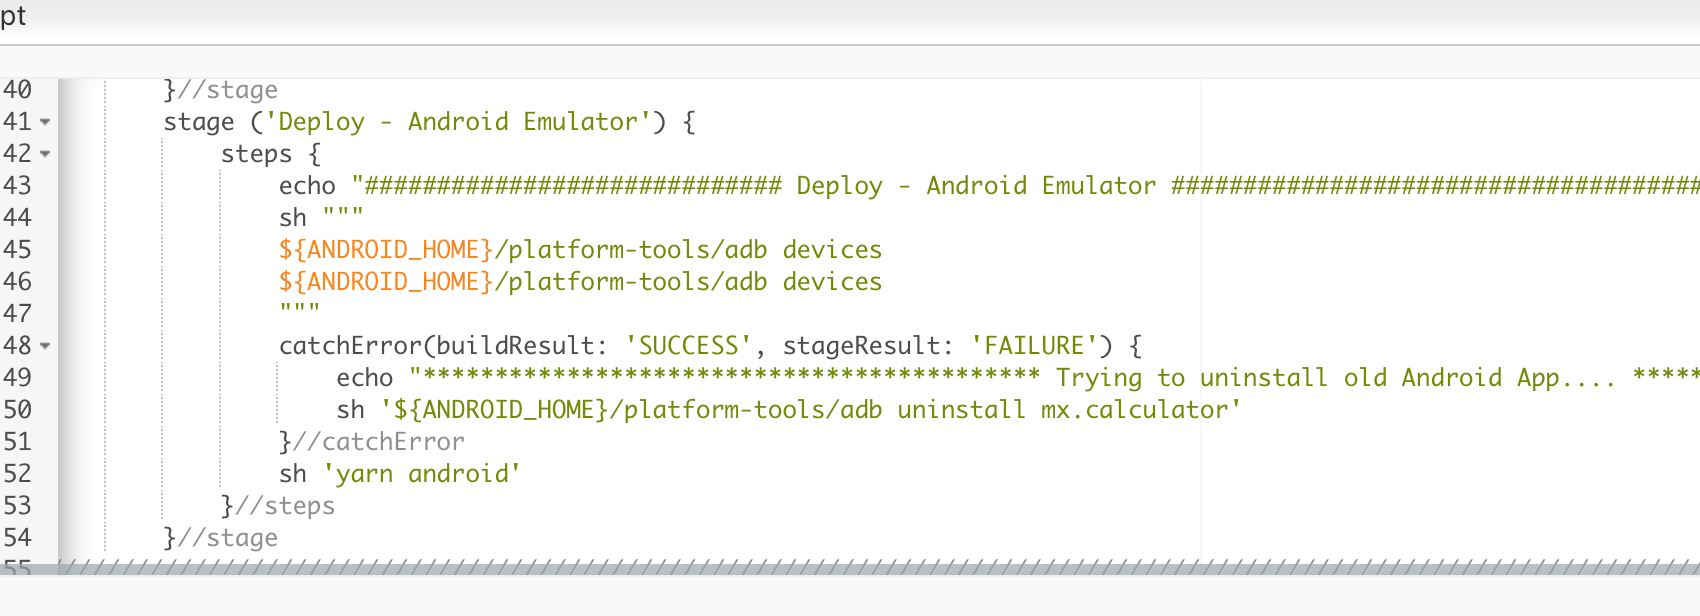
7.2 Deploy – Android Emulator
- In this step, we’re going to finish building the app and deploy it to our Emulator. Inside the cathError{} tries to uninstall the app if it’s already installed (Previous version of the app) and then installs the new version.
Enlarge
Step 7.3
Run Automated Test Cases
- Finally, we’re going to connect to our Test Repository (Local) to run the test cases. This step is going to change depending on how the Automation Framework is made. This automated framework runs using TestNG and Maven.
Enlarge

To know how to create an Automation Framework using TestNG please go to the post Automating with Appium – Selenium and TestNG
Step 8
Let’s run our CI/CD Pipeline in Jenkins.
Enlarge
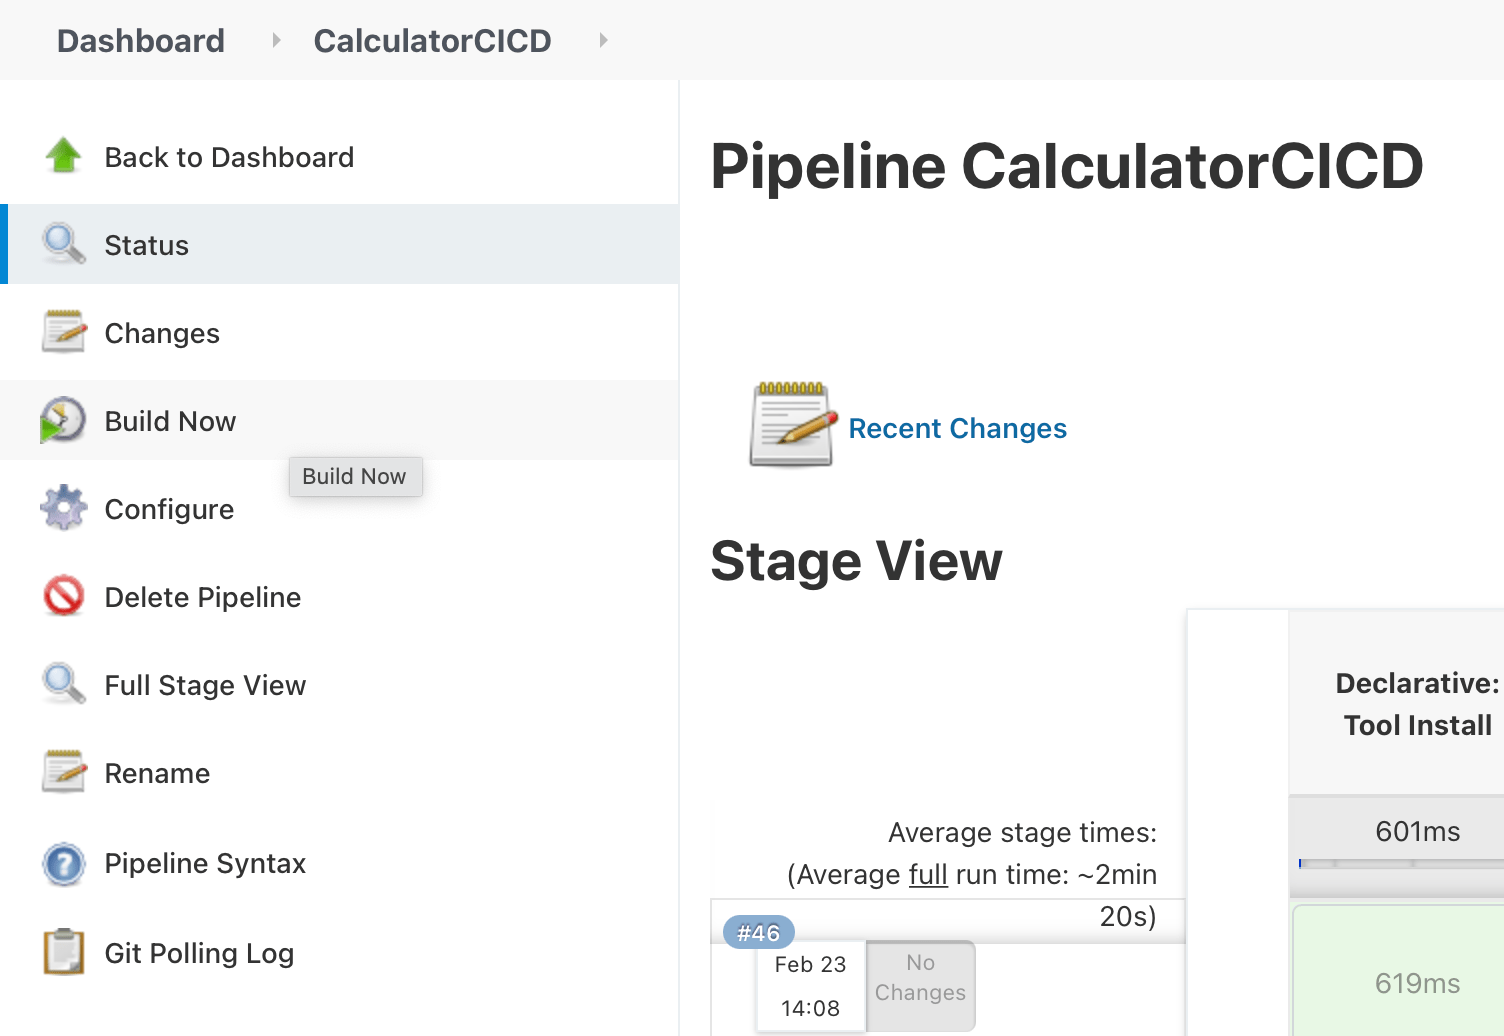
We’re going to see our pipeline results under our project’s dashboard, and the build number.
Enlarge
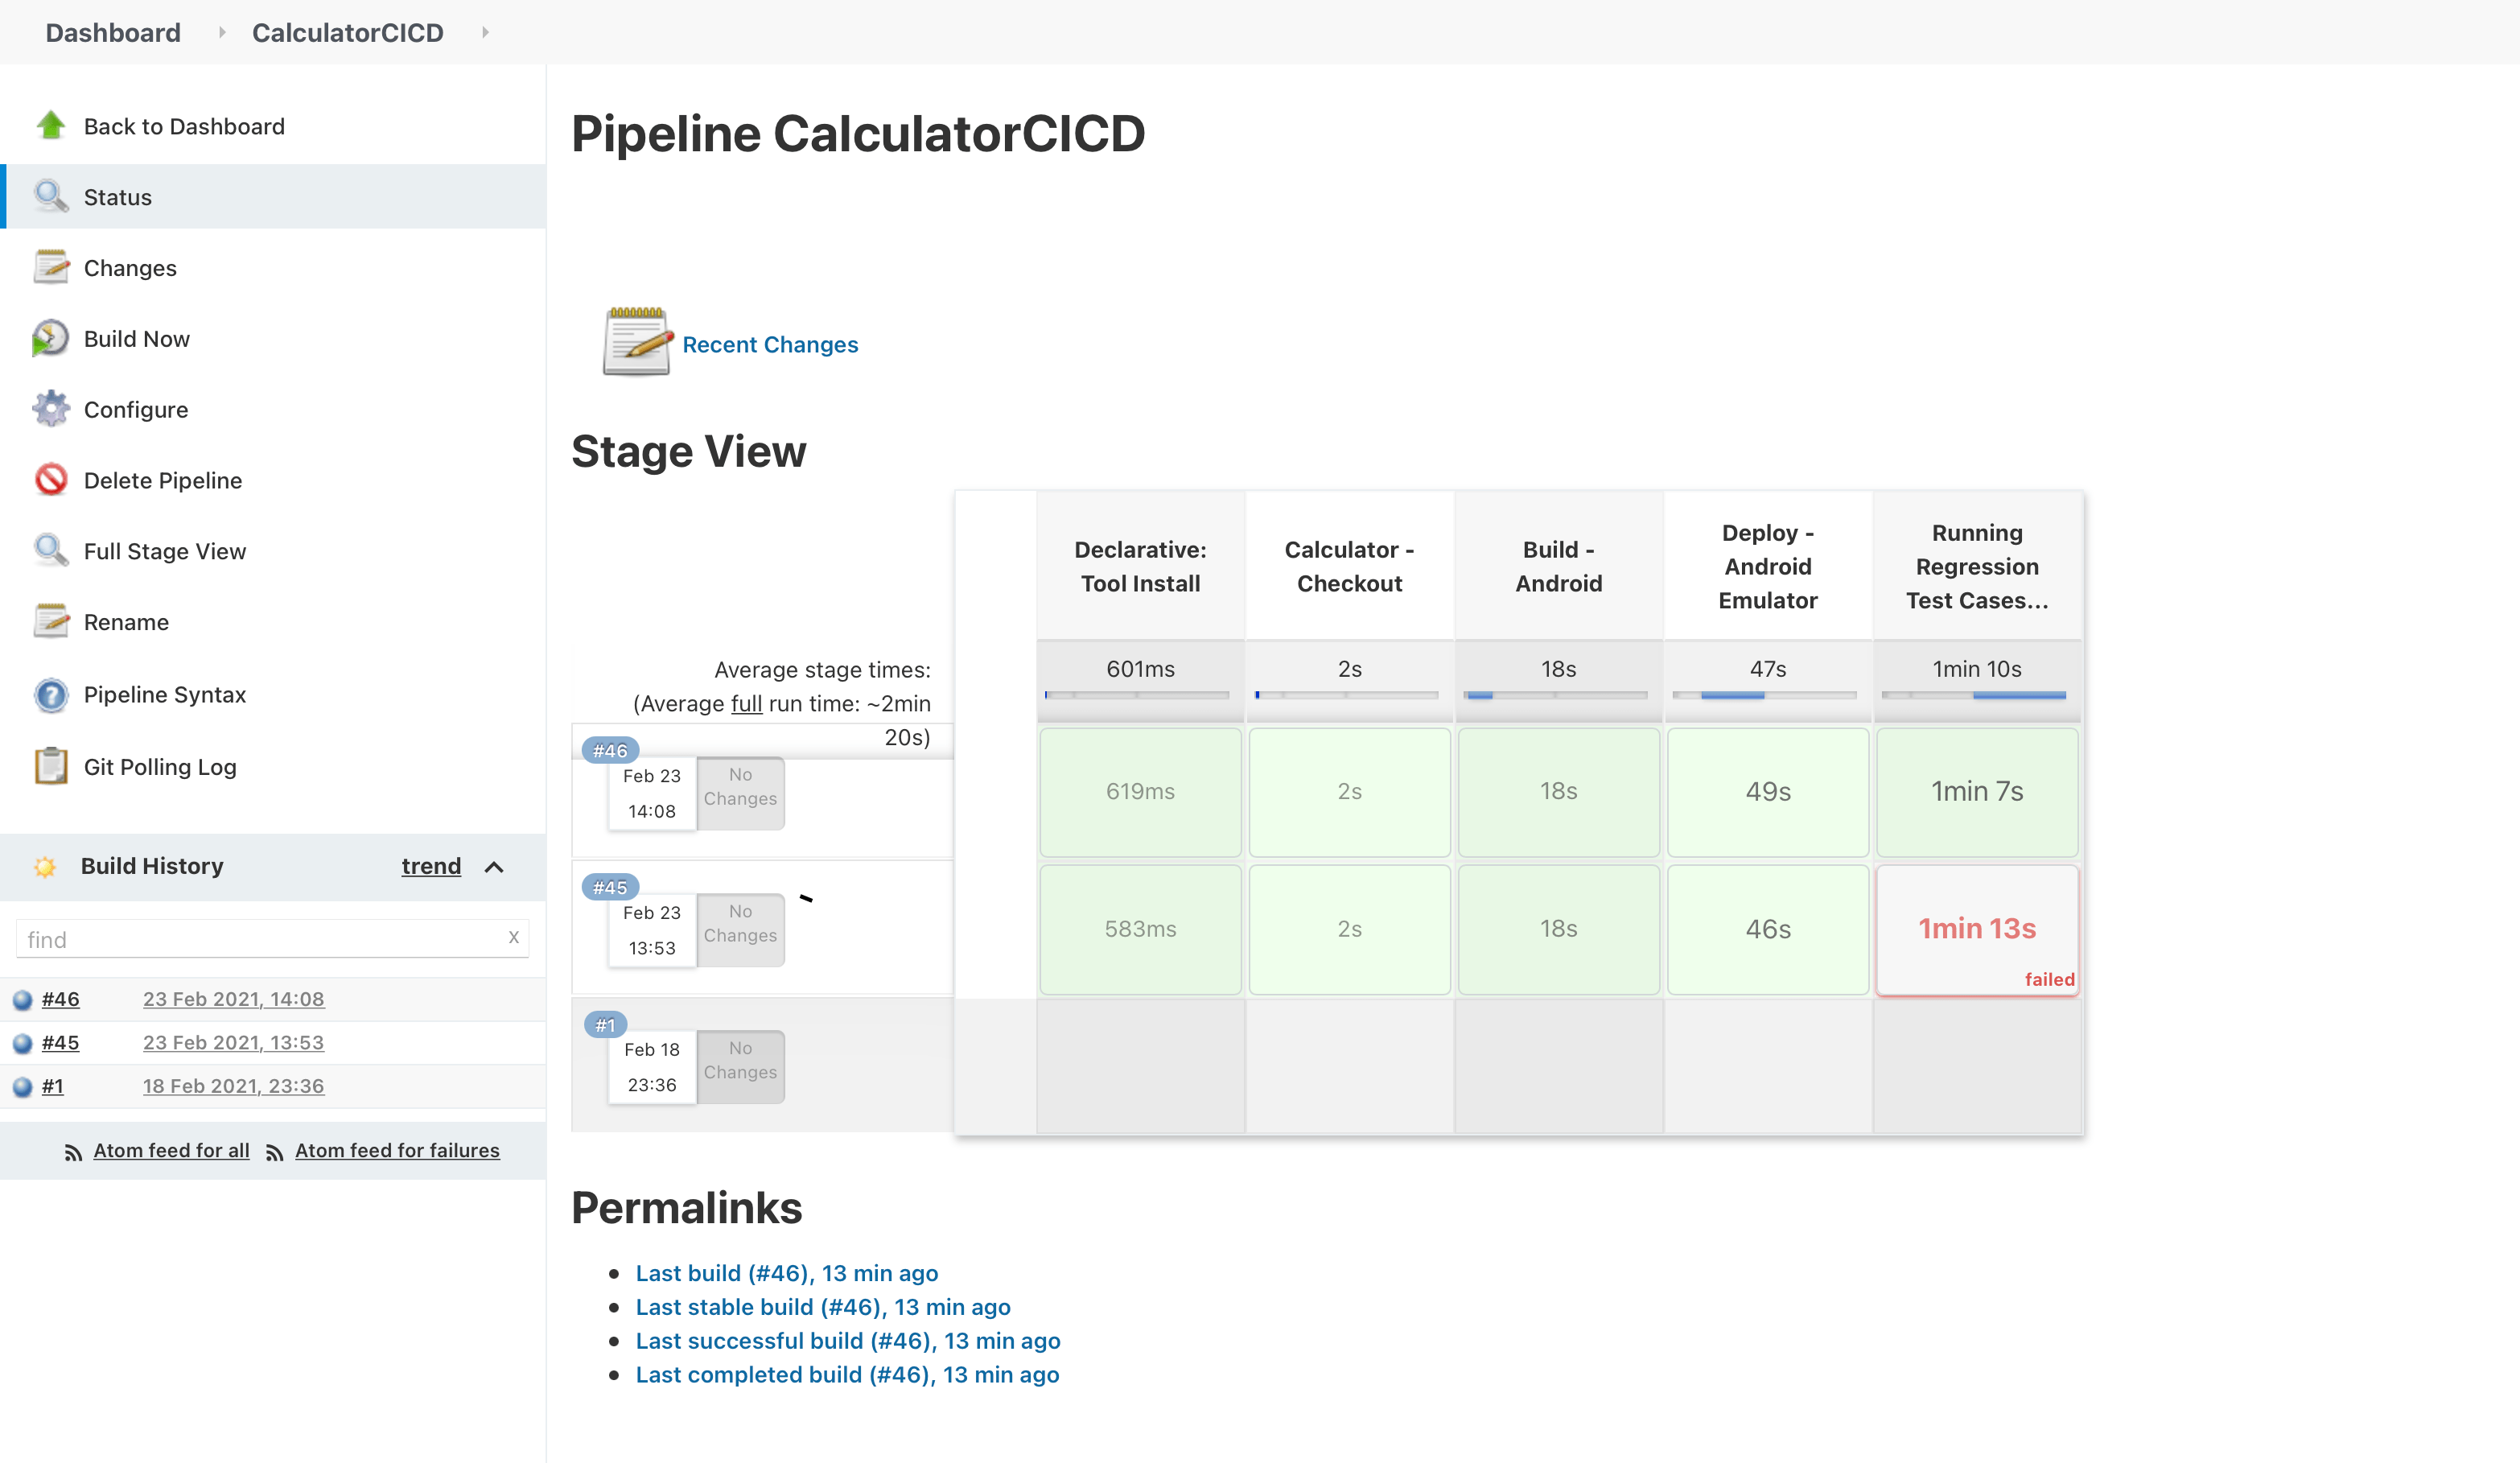
As you can see create a local pipeline to implement a CI/CD env it’s really easy, from here you can customise your Jenkins pipeline using different plugins according to your needs.
Link of interest:
Automating with Appium – Selenium and TestNG
The Agile Team Approach
What Scrum Master Certification to Choose?
Speed Up Android Testing with TestProject Agent
Books to learn more about:


Any help is welcome to help us keeping this effort alive!

Angélica Viridiana Rebolloza
Computing Engineer specialized in Automation, working with different tools for Mobile and Web, using languages, tools, and platforms like JAVA, VBScript, JavaScript, C#, Appium, Protractor, UFT (QTP), Selenium, WinAppDriver, Jenkins among others.
Viridiana also has been working using practices like TDD & BDD under Cascade and Agile approaches.
Some certifications include: ISTQB Foundations Certification, SeU Selenium Certified, ITIL Foundations Certification.


