

What is Desktop Automation?
Desktop Automation focuses on creating automated tests for computer Applications whether these are native Windows Apps or not.
This type of automation focuses on Front End Testing as the interactions and flows cover only the front of the app. It’s similar to Web and Mobile automation as it also uses “drivers” to create a connection that interacts with the App.
The are several tools and frameworks to automate Desktop Apps, but one of the most used and powerful tools to do it is WinAppDriver.
What Inspectors are?
Inspectors are tools that let us see the Document Object Model (DOM) of an app, this DOM is a representation of the structure of an app as an XML Document. By inspecting and seeing the DOM is possible to understand how the elements of the apps like buttons, text, and text boxes are structured, get the properties of these elements as its locators like ID, Name, ClassName, XPaths, and so on, and which of them are contained on specific Panels, Windows and Tabs.
Currently, on the market, we have different inspectors that we can use, the most common for any platform is Appium Inspector and for Windows is Inspect.exe which is contained directly on Windows SDK Kit.
What is WinAppDriver?
Windows Application Driver (WinAppDriver)is a service that supports Selenium UI Test Automation on Windows Applications like Universal Windows Platform (UWP), Windows Forms (WinForms), Windows Presentation Foundation (WPF), and Classic Windows (Win32) apps.
What is BDD?
Behavior Driven Development is an agile software development process that allows the design, creation, and product testing, using the behavior of the product itself and making it easier for technical and non-technical users to understand the product. This approach improves the understanding of Testing for all the Team Members, as instead of showing Testing Scripts full of technical verbose like classes, methods, and variables, we can show the Steps in Natural Language.
The most common tools to implement BDD in Testing are Cucumber and Specflow, the latter is the most used tool in Windows for Visual Studio and C#.
What is Specflow?
Specflow is a test solution to implement BDD in our framework, using Gherkin language and binding of steps definitions for Net-based apps. Currently is really easy to start using Specflow as it can be easily installed using Nuget Manager in any VS project.
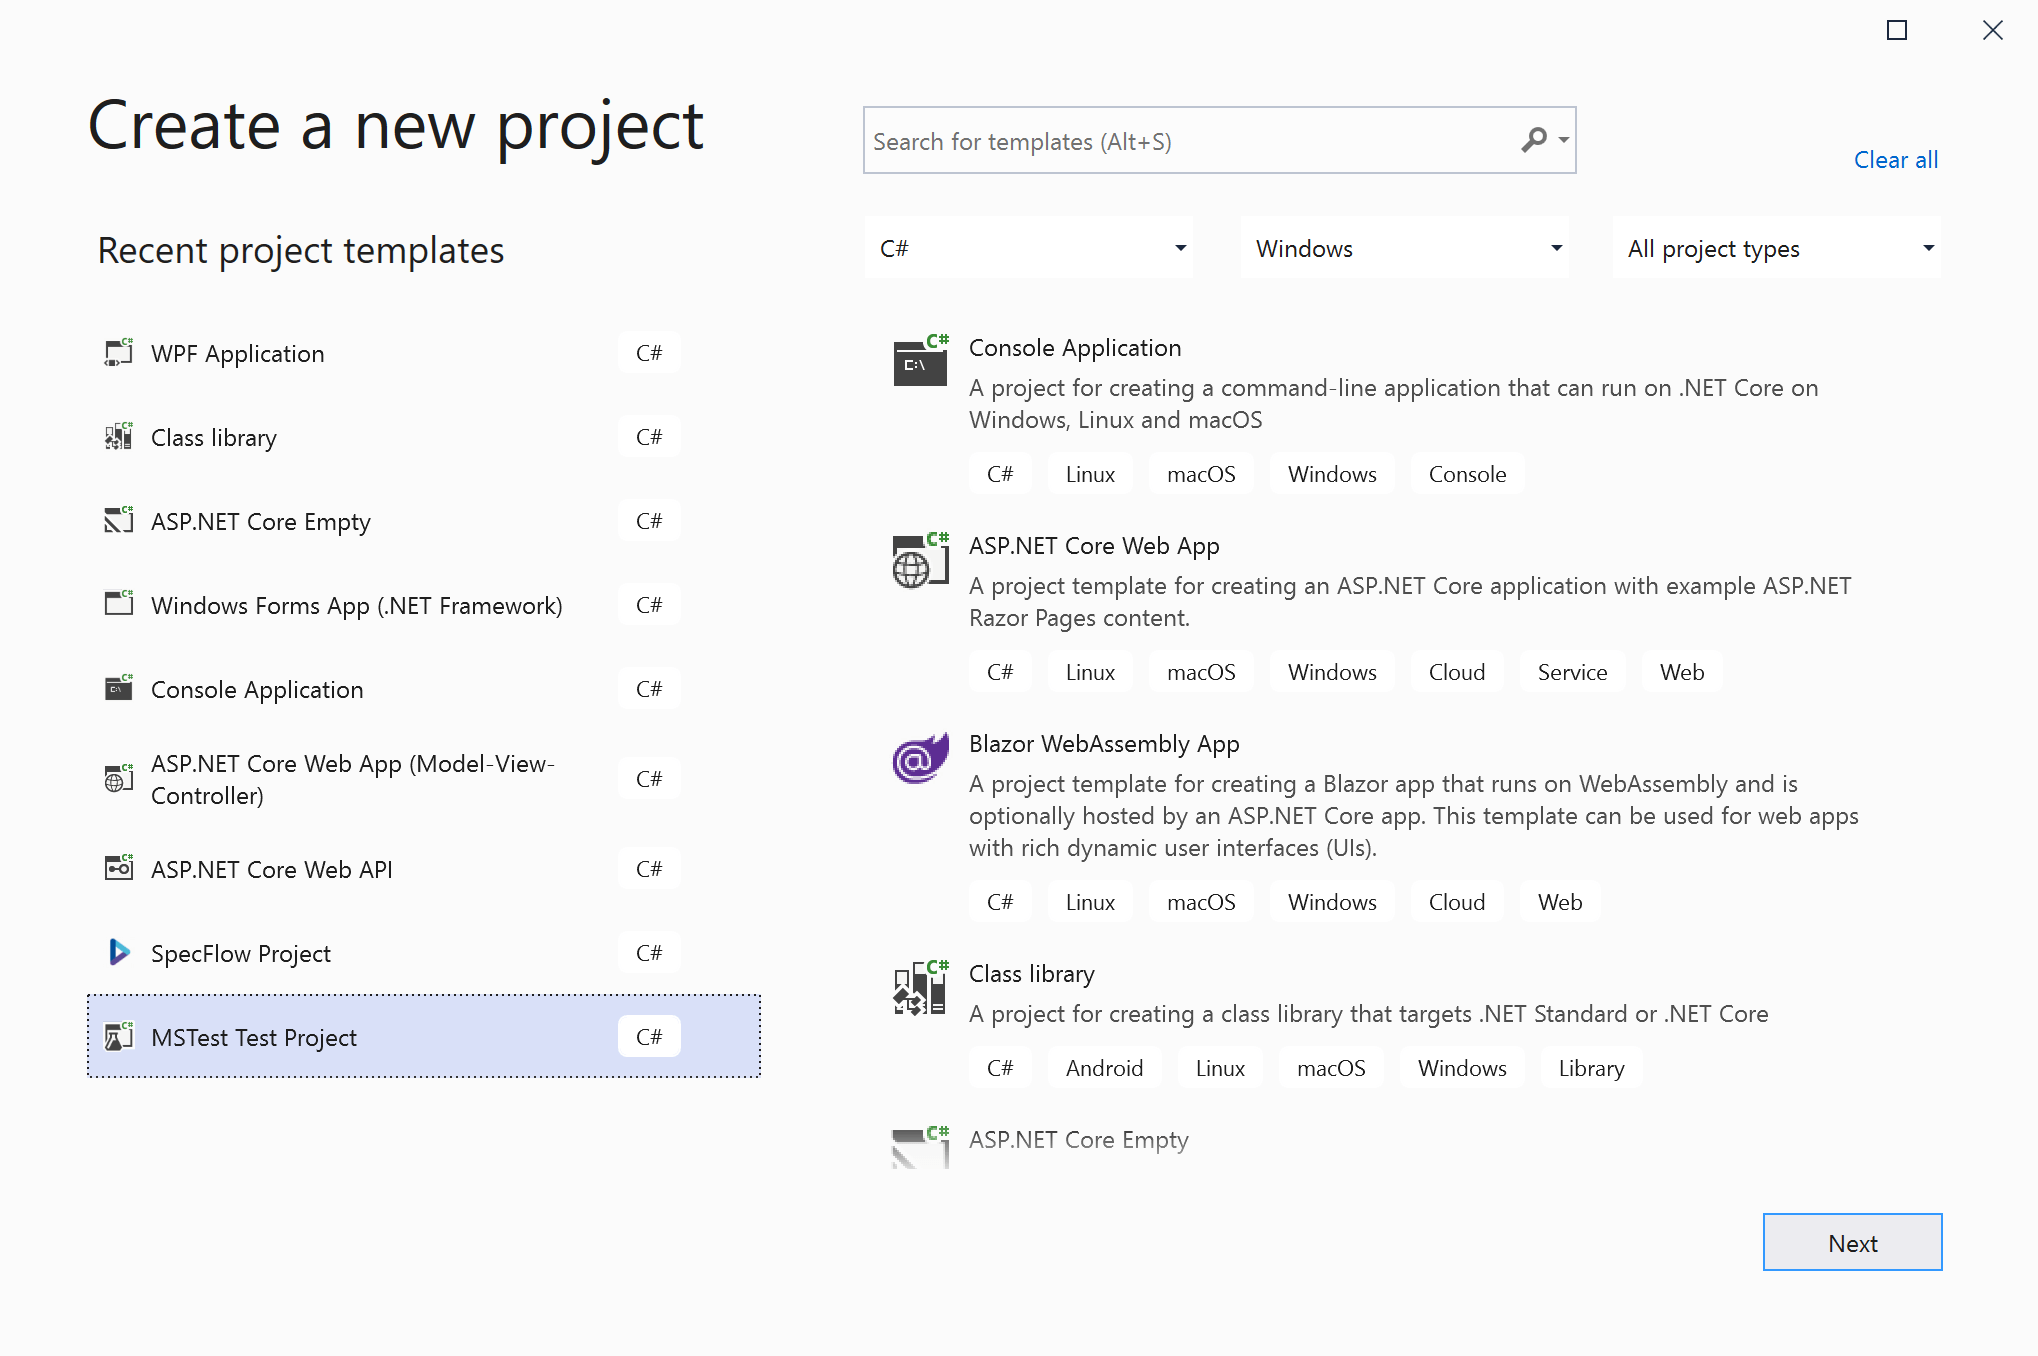
Creating an MSTest Test Project
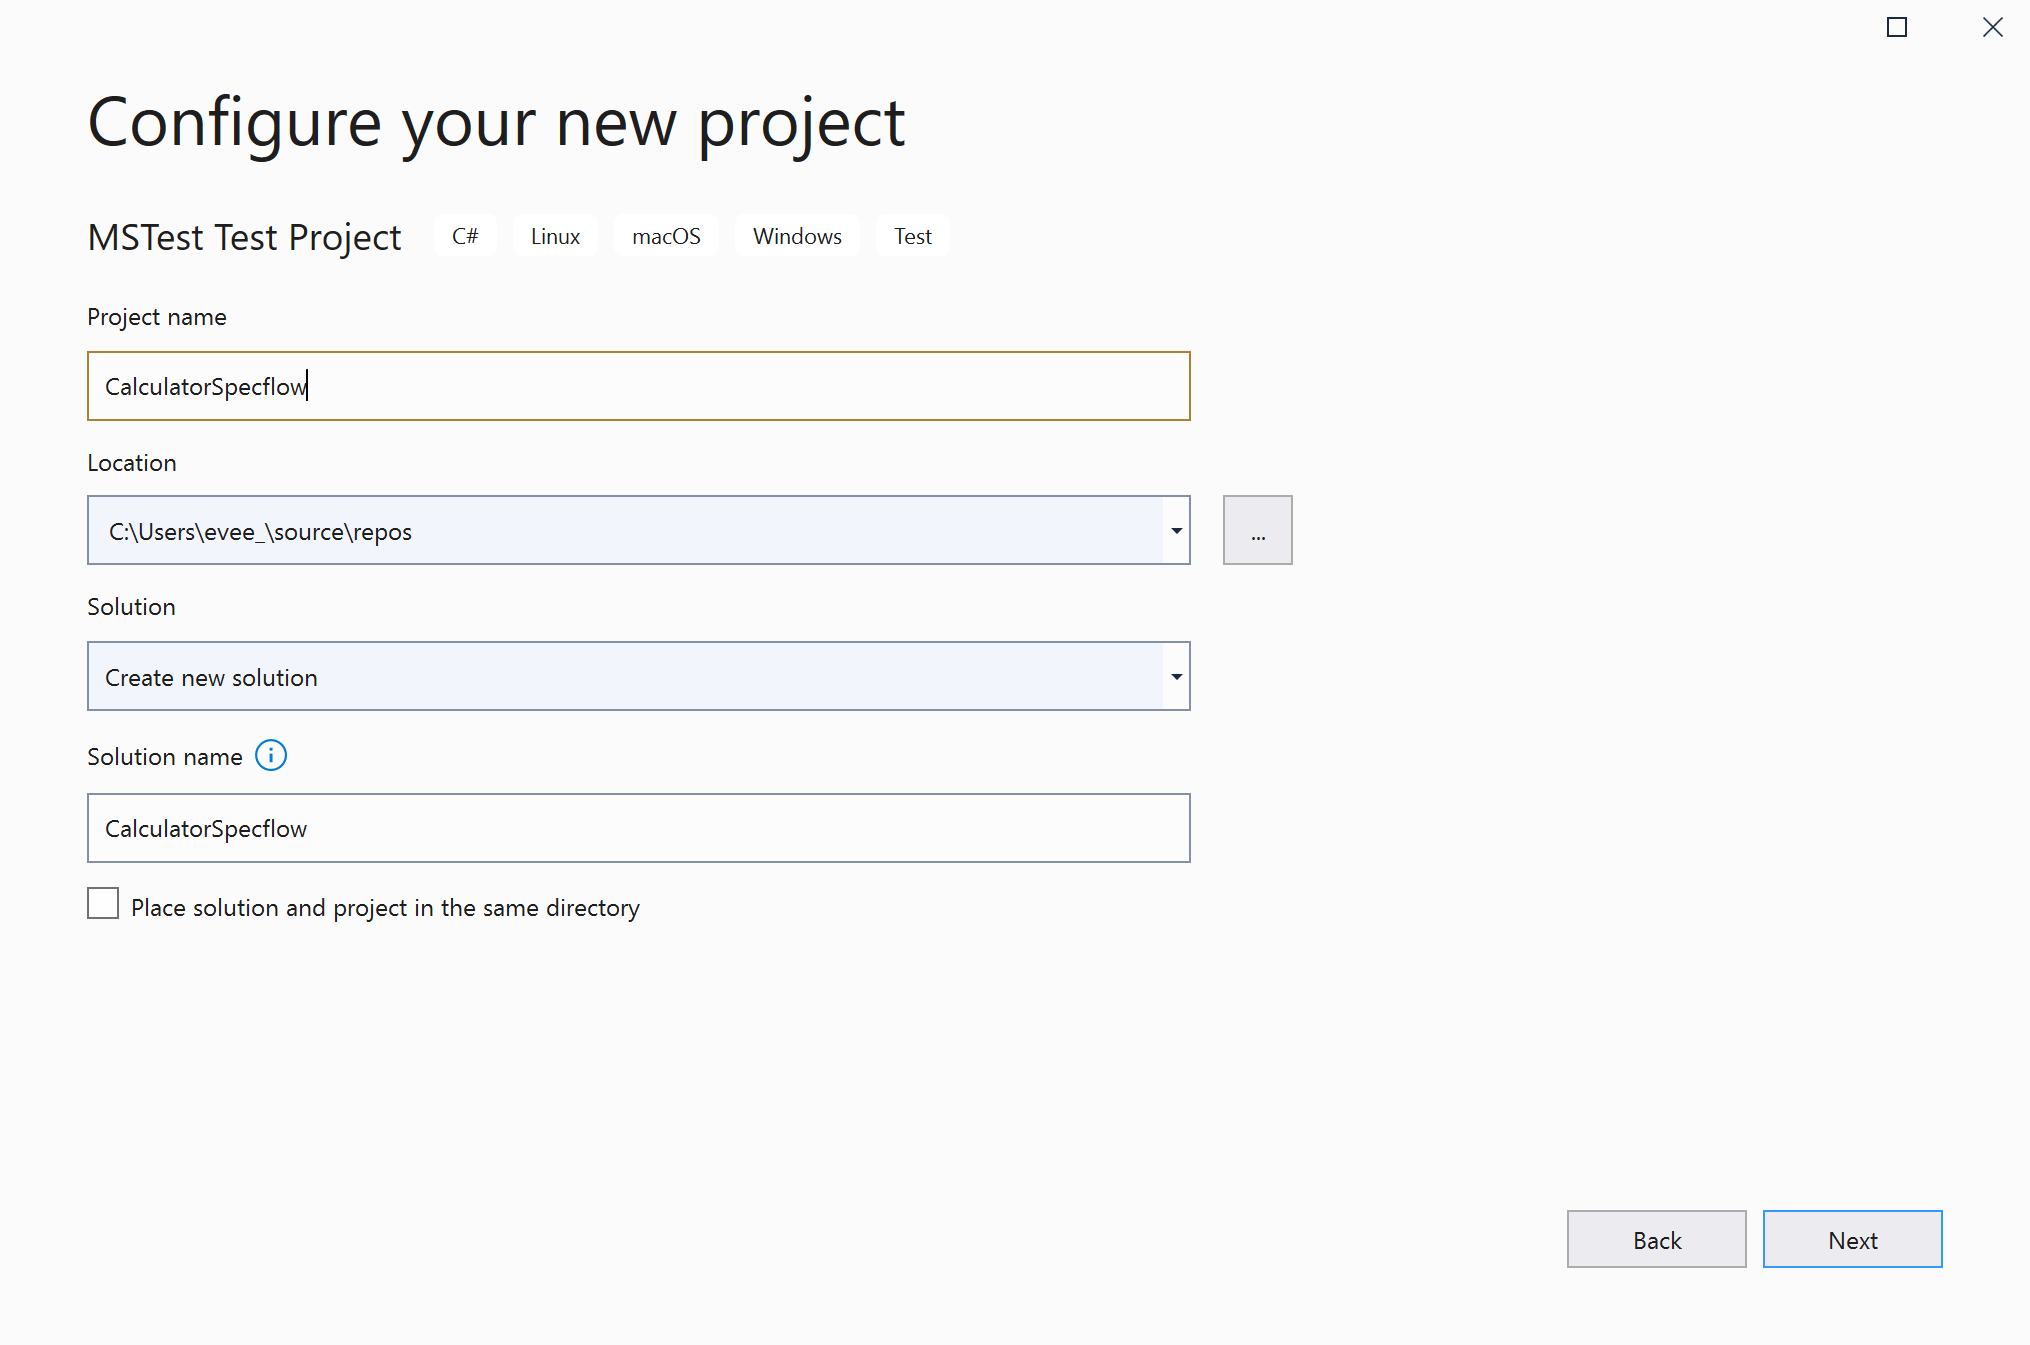
For this example, we are going to create a VS Project of MSTest Test Project type, is important to notice that we can use any type of project to implement Specflow, even a Specflow-type project.
Enlarge
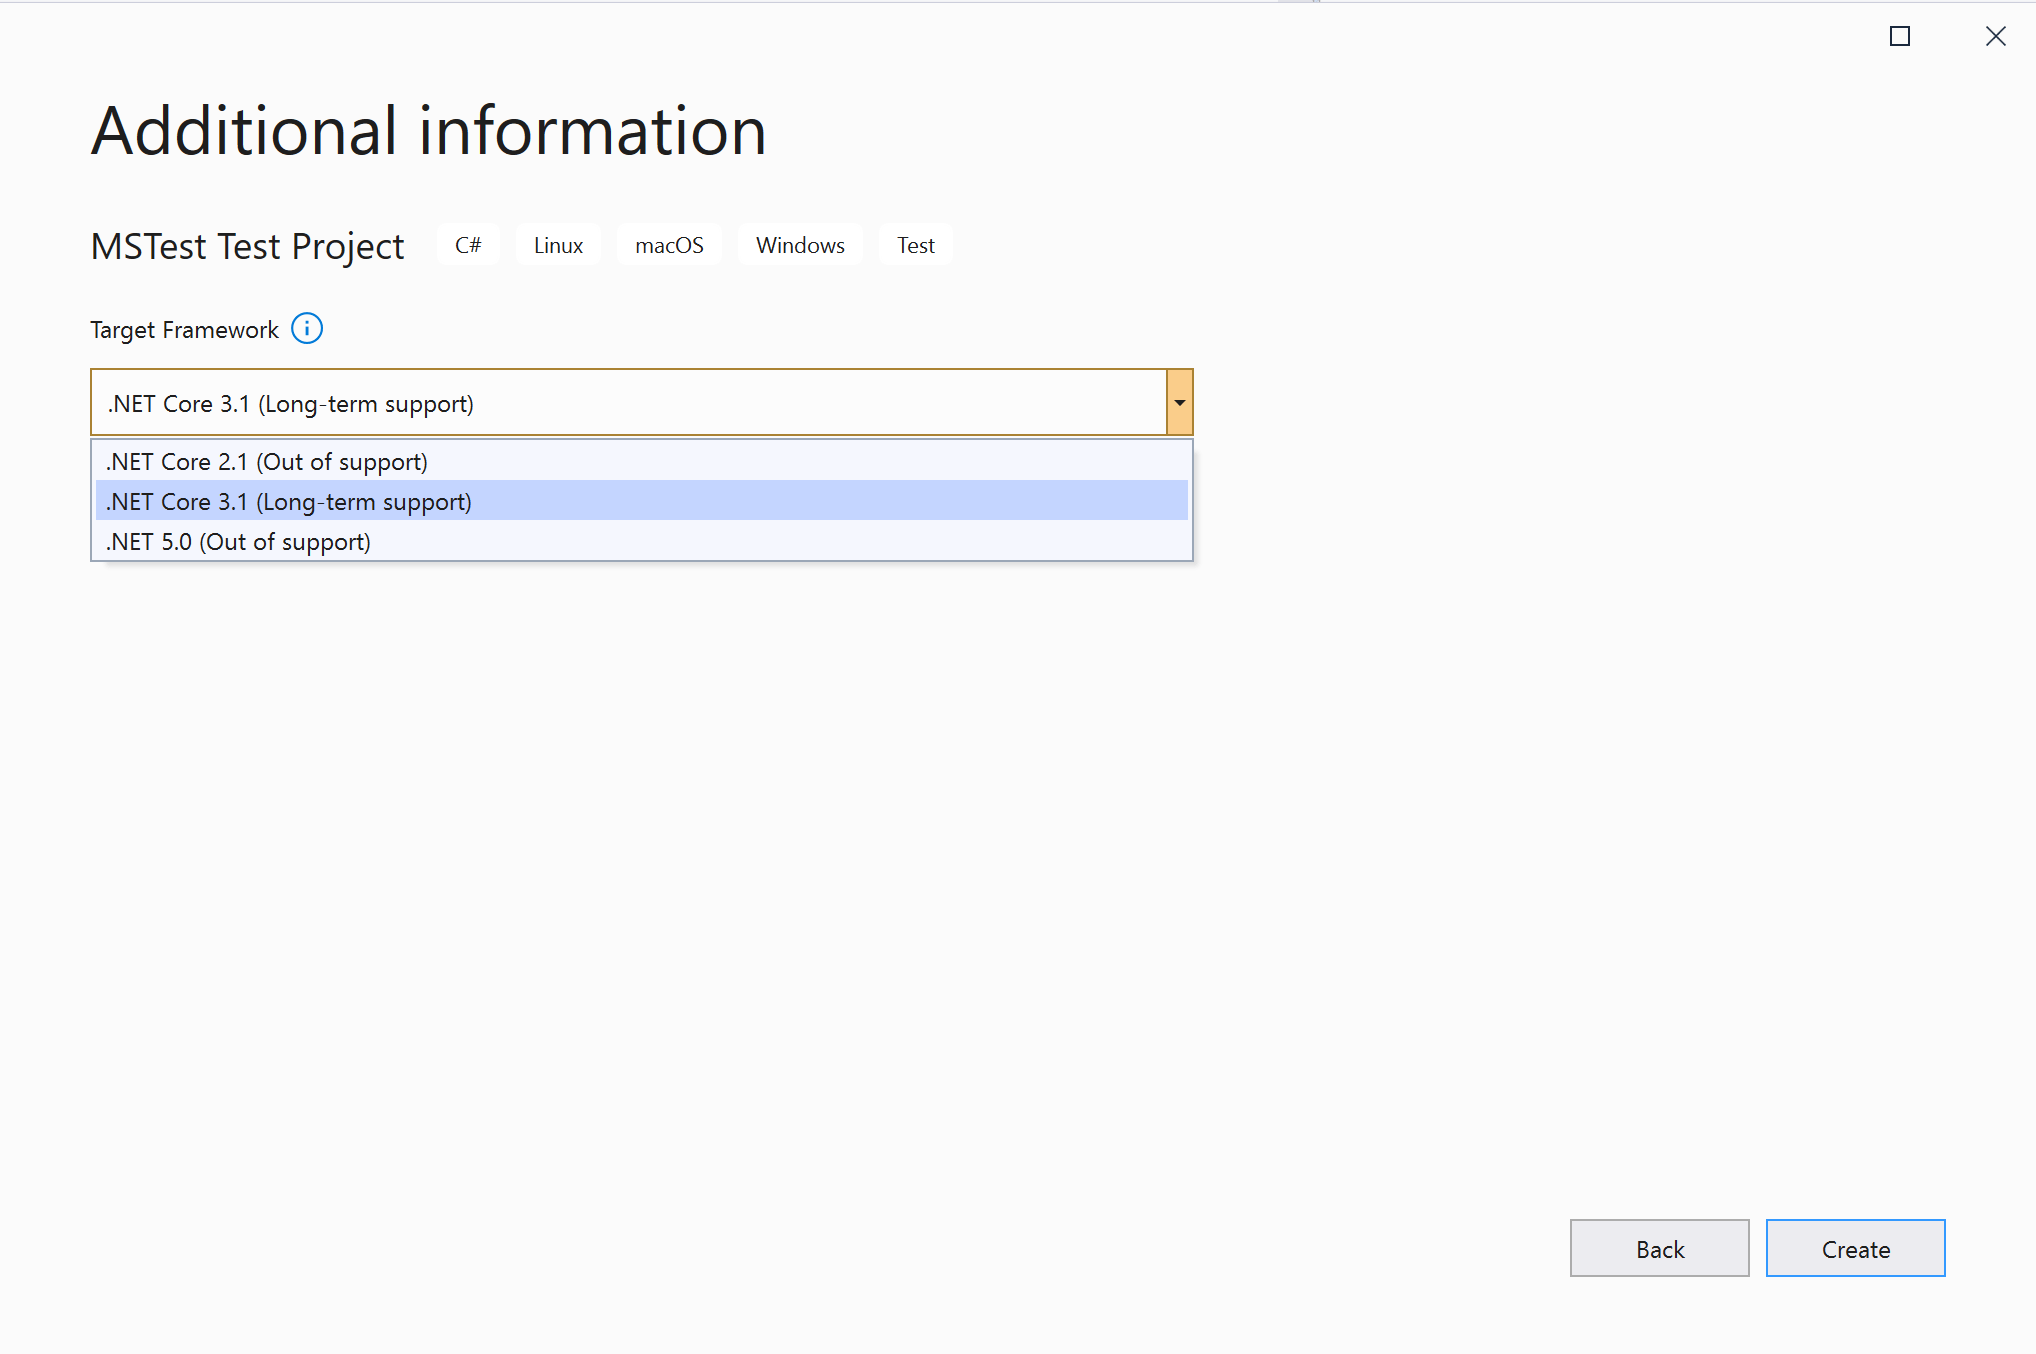
Also is essential to choose the correct Net Core version for our Project, this may vary depending if the automation is going to be forcefully used by the old Net Core version, but keep in mind to always try to choose the latest version of Net Core.
Enlarge
Enlarge
Adding Specflow to VS
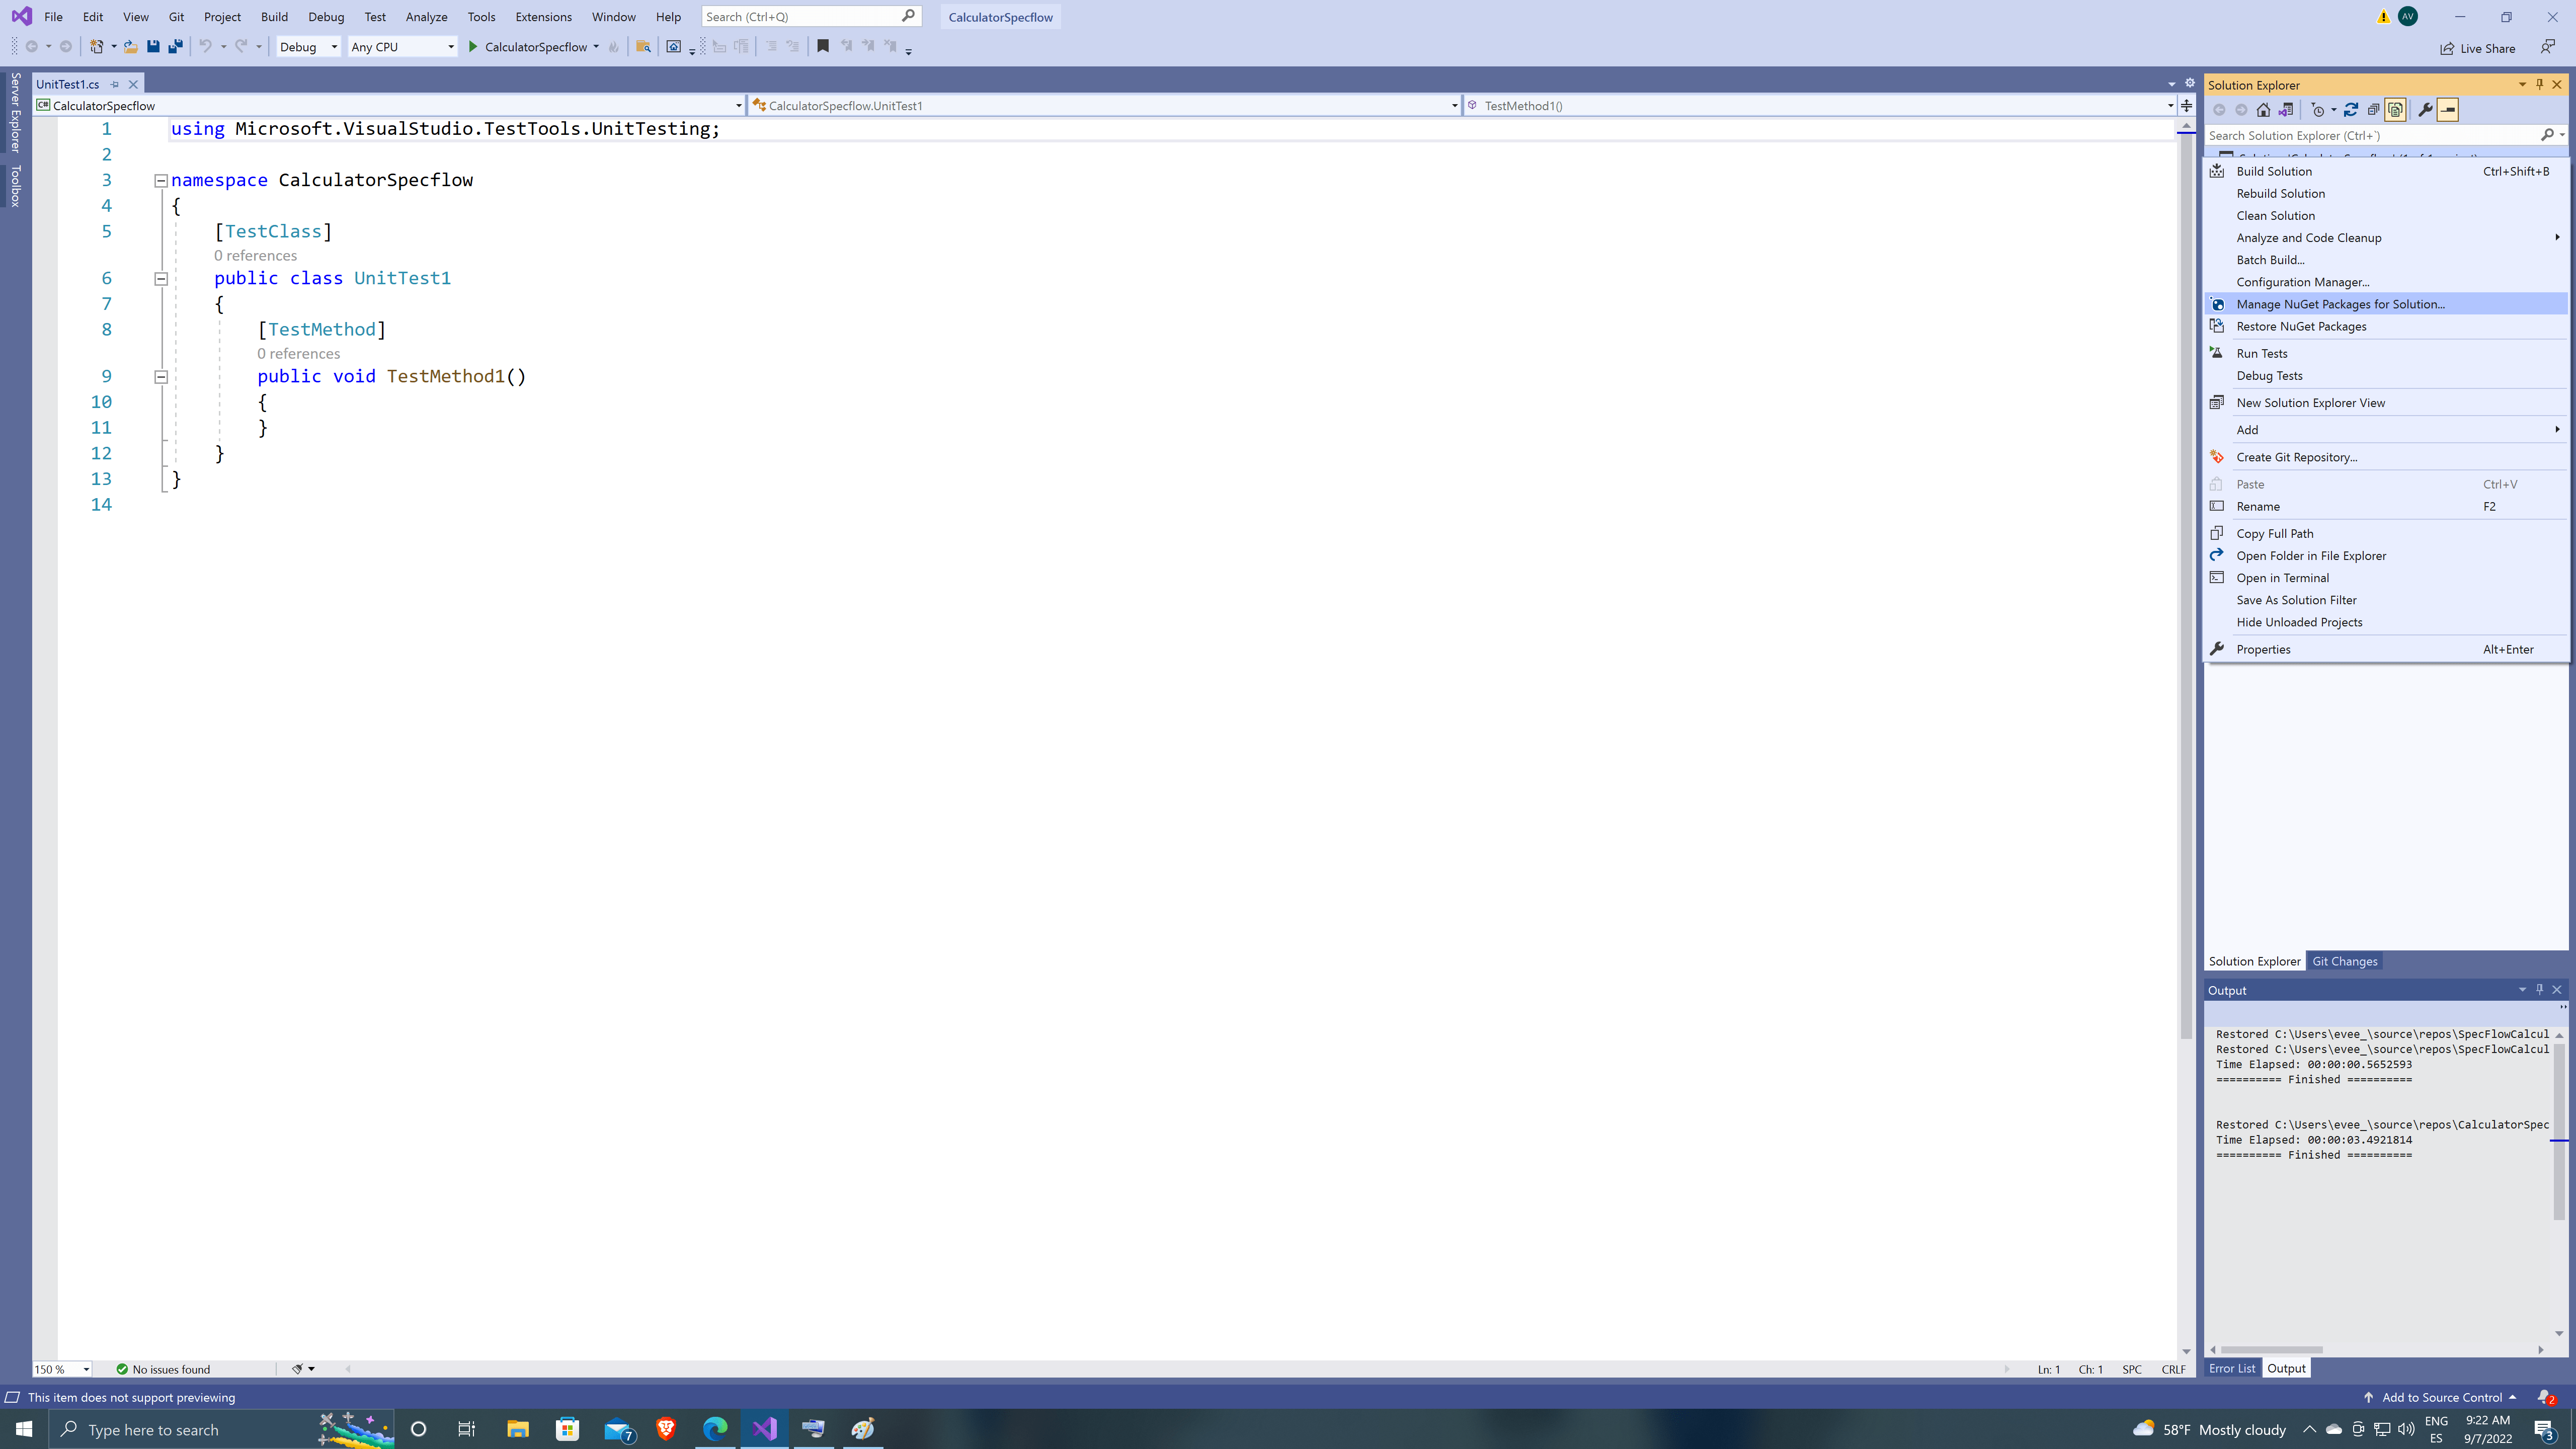
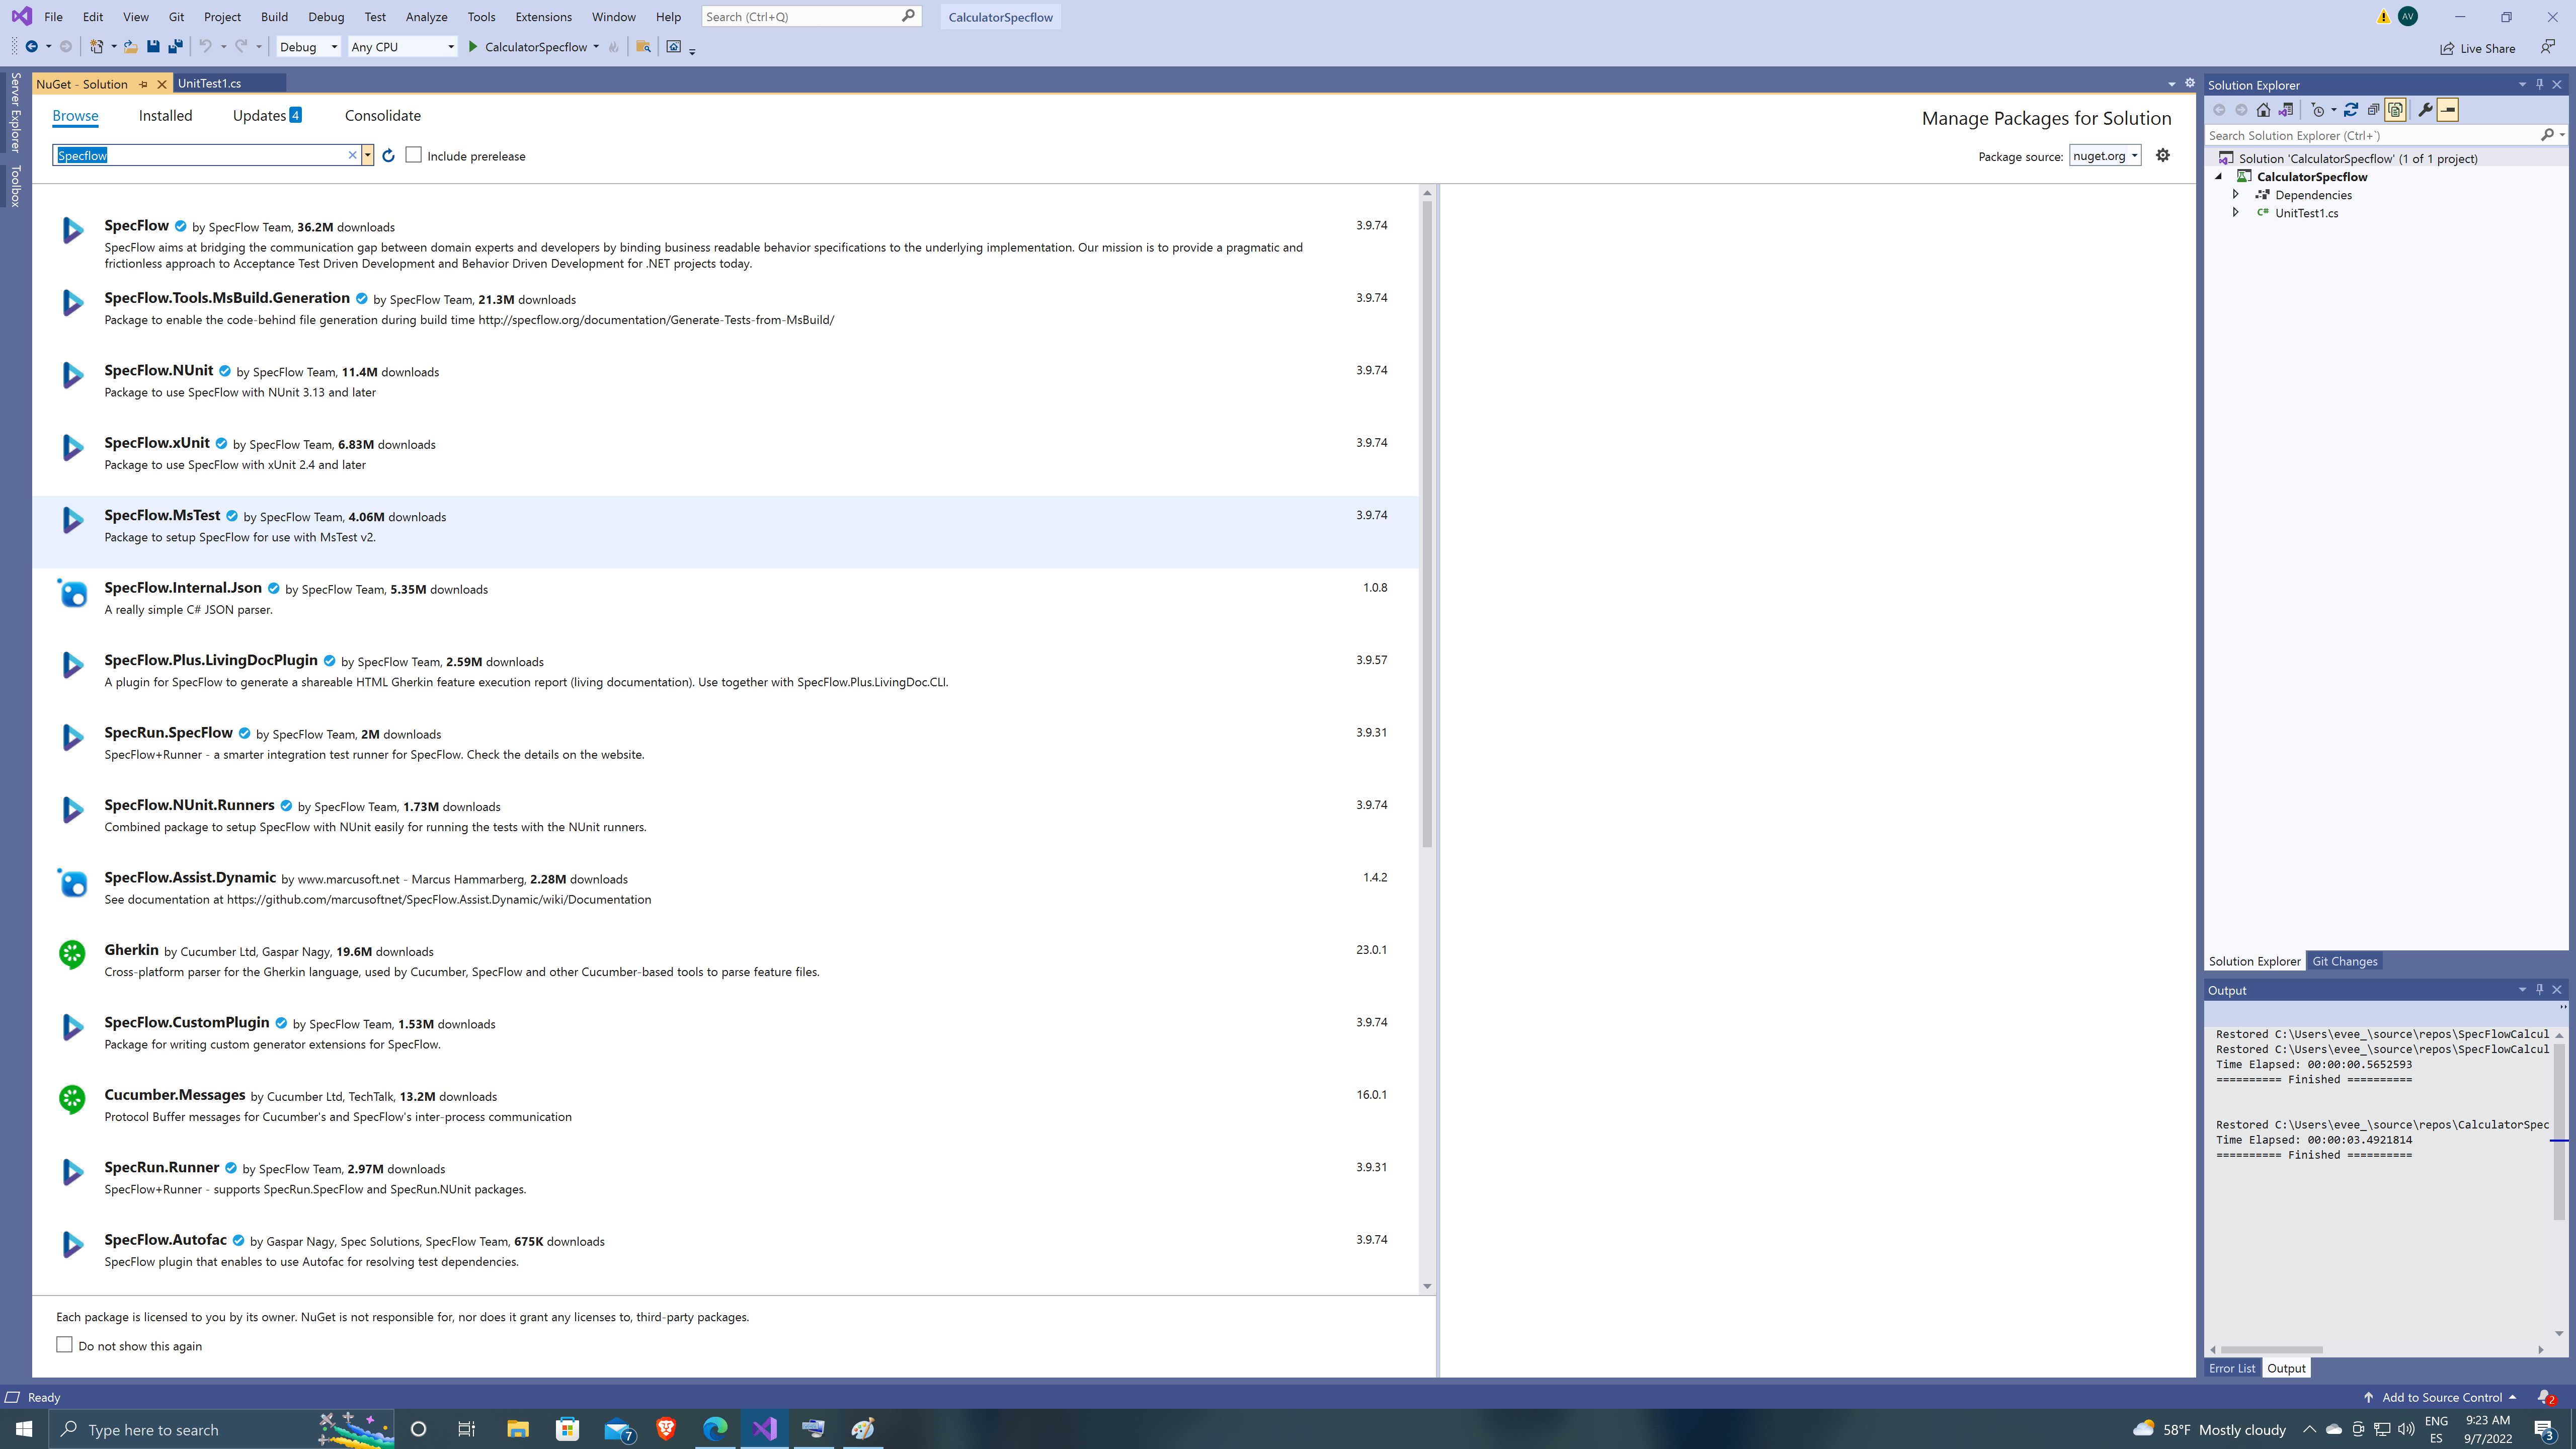
By default VS will create a UnitTest1.cs, we will dispose of this class later, first let’s add Specflow to our project by going to Manage Nuget Packages on our solution.
Specflow has different packages, for this solution we are going to use Specflow.MsTest as is the standard Specflow version to use on MsTest Projects, also we are going to install Specflow.Plus.LivingDocPlugin, to add some HTML results to our tests!
Enlarge
Installing WinAppDriver and Setting up
Before continuing we need to install WinAppDriver from GitHub – microsoft/WinAppDriver: Windows Application Driver, to be able to open and interact with the Desktop app, we use WinAppDriver, this app will create a session between the app and our tests.
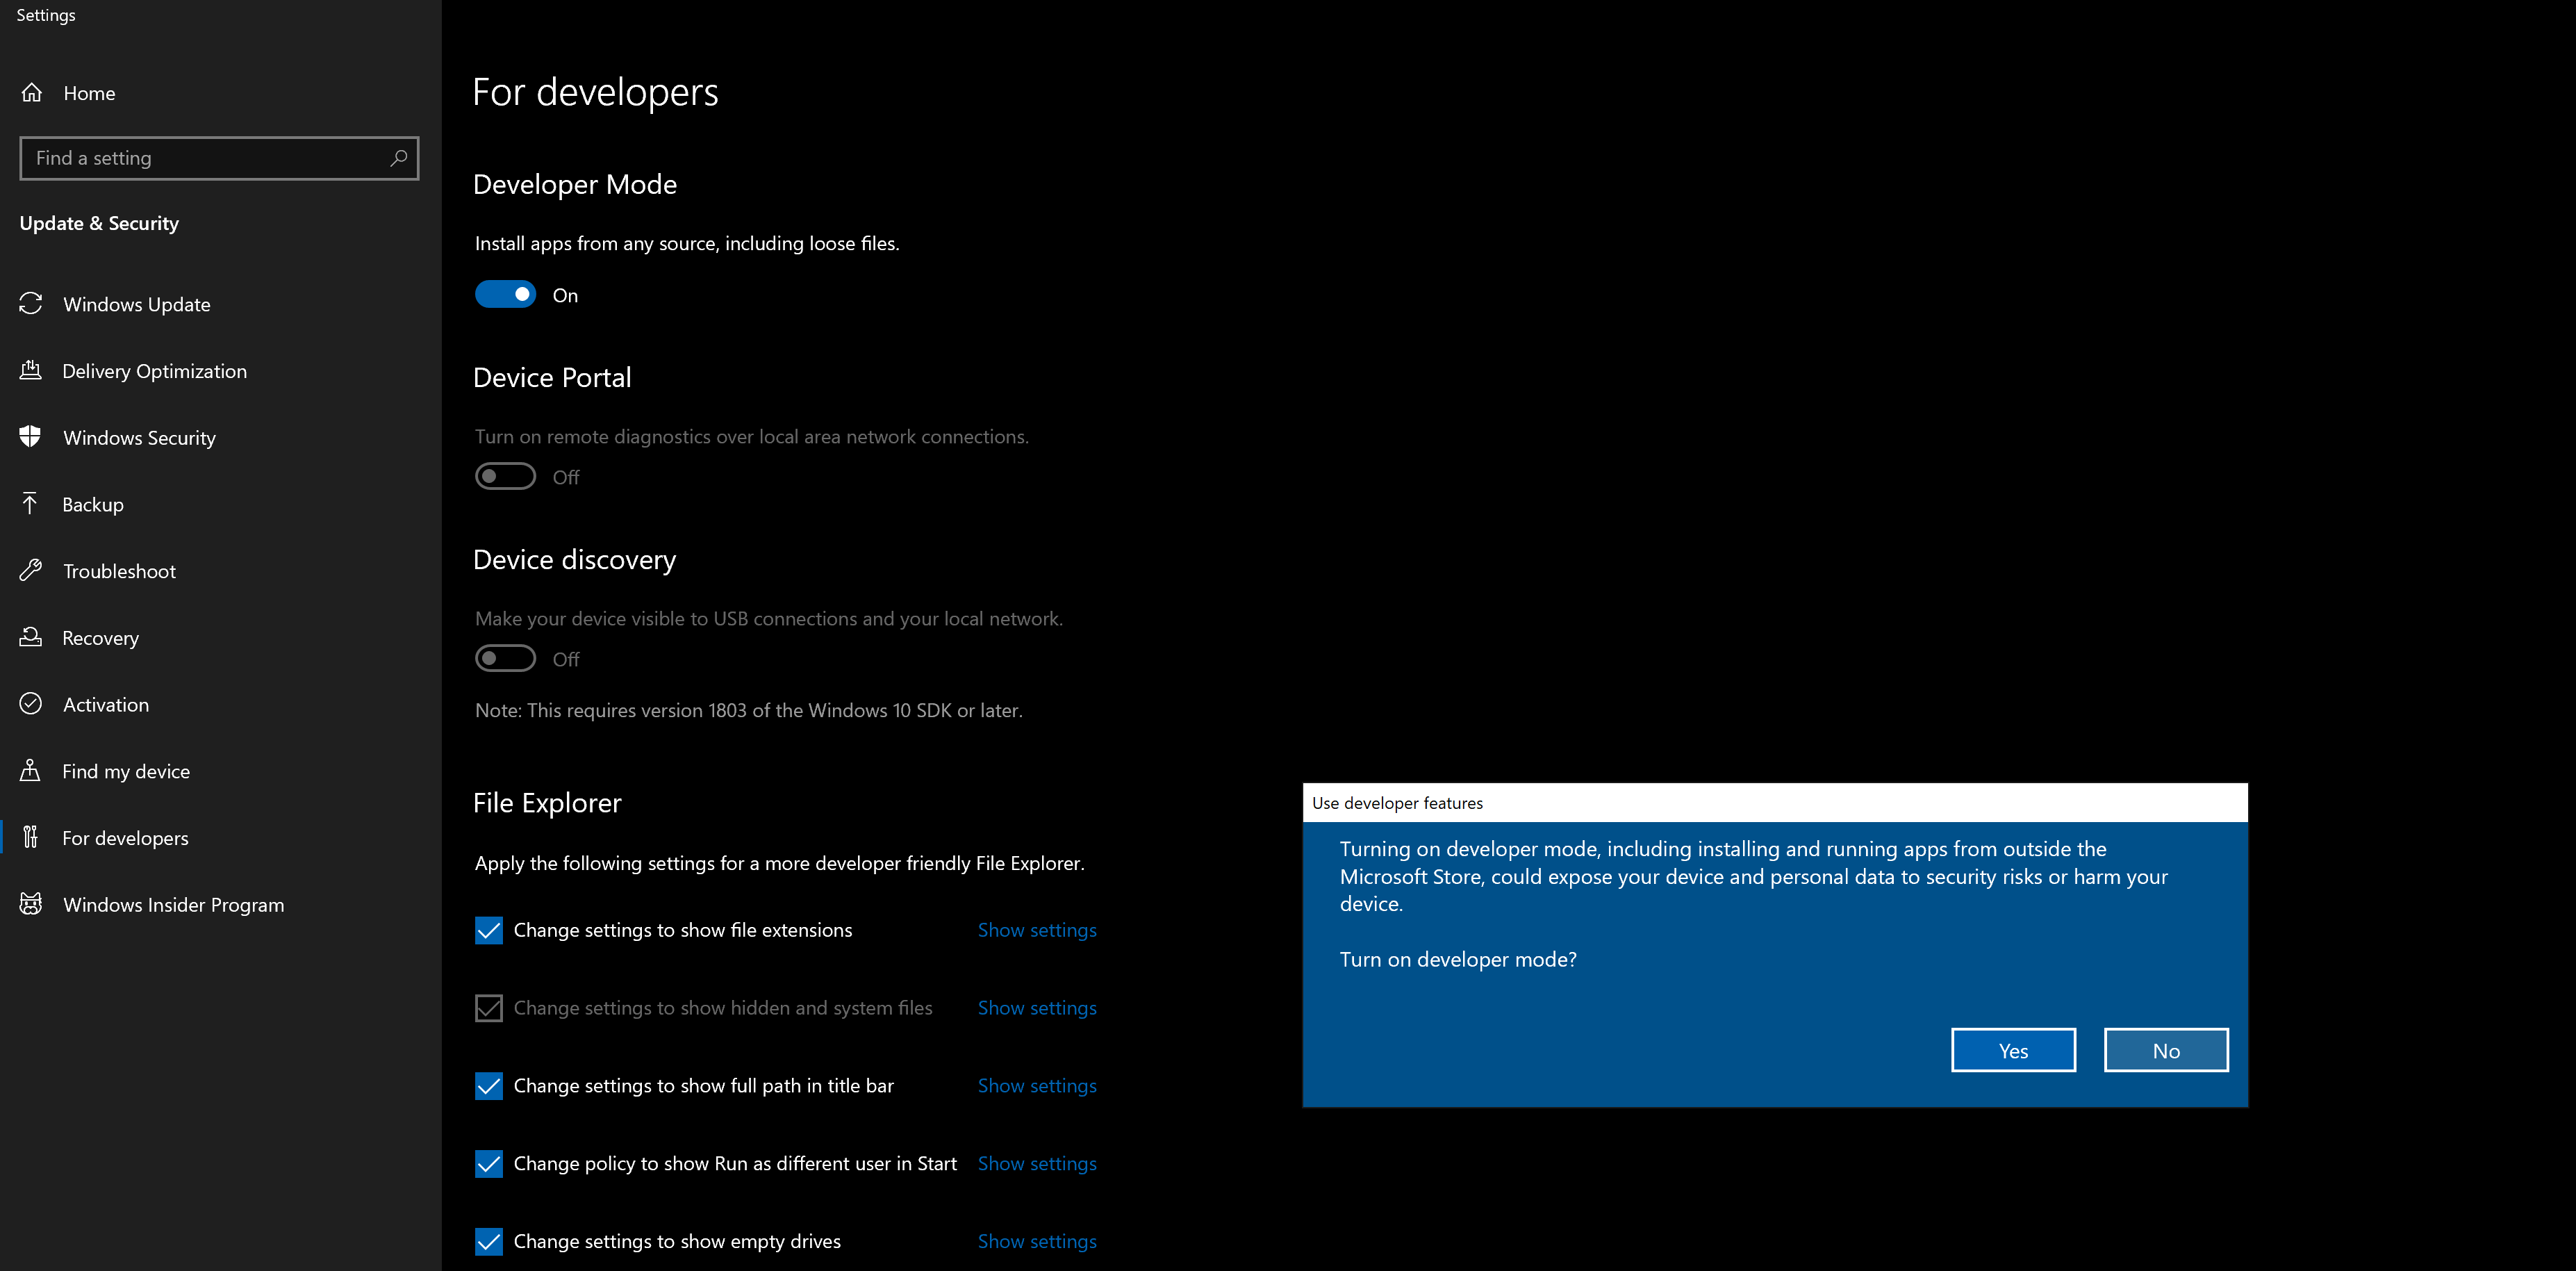
Please be sure to enable Developer Mode in Windows to run WinAppDriver.
Enlarge
Let’s create our first class that will contain the basic Setup to open the app and create the WinAppDriver session.
To be able to use WinAppDriver classes and methods we need to add to our project more Nuget packages, in this case, Appium.WebDriver.
Using AppiumOptions we can add capabilities, like “app”, this one can get whether the path location to the app or its specific ID, for default Windows apps, it’s better to use this ID, by going to PowerShell and typing “get-StartApps” and locating the Calculator app to obtain it.

Additionally of just creating the session, we are going to add two more methods, one to validate if WinAppDriver Process is already running and the other to Start WinAppDriver else, these methods are useful to avoid having to run WinAppDriver manually.
We can avoid opening the cmd with WinAppDriver logs, but I recommend it to validate the commands and interactions received by WinAppDriver.
Automation Framework
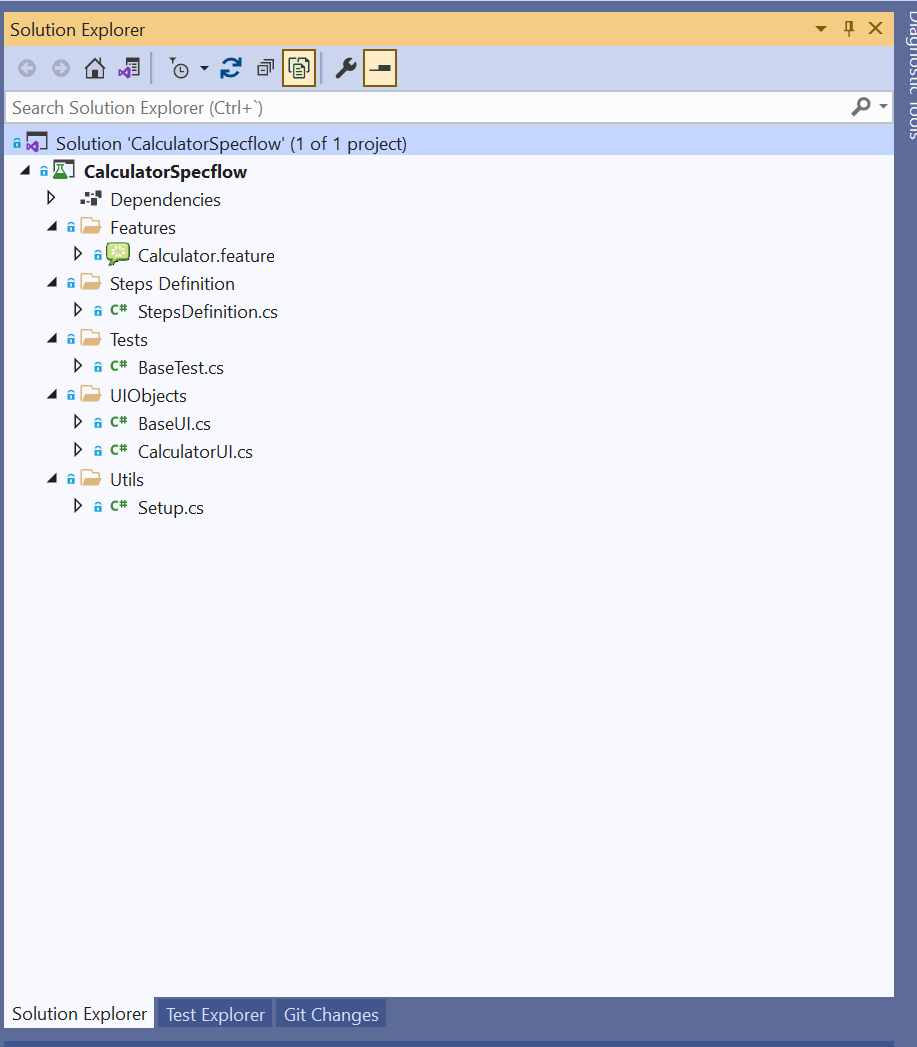
Create the Class “Setup“ under the folder “Utils“.


Let’s create our first feature file, which will contain all the steps need it to make a simple addition of two numbers, this feature file is made using Gherkin, which uses Natural Language. Keep in mind that steps in feature files have to be really simple and easy to understand by every person in the team.
Create the Feature file “Calculator.feature“ under the folder “Features“.

Once we have our Feature file, we have to bind these steps to our code, we are going to create a new class that will contain Methods bound to the steps in the feature.
To get the elements of the calculator, we need to use “inspect.exe” available inside Windows SDK Kit, located at “C:\Program Files (x86)\Windows Kits\10\bin\10.0.22621.0\x86\inspect.exe”.
Open Calculator, and then execute “inspect.exe“, hovering on the element you want to know the locator.

We have different types of locators, but it is always recommended for integrity and speed to use “AutomationID“, as it is unique, if this ID is not defined, we can use “ClassName“, “Name” or get the “XPath” of the element verifying the DOM of the application. It is also possible to use multiple locators.
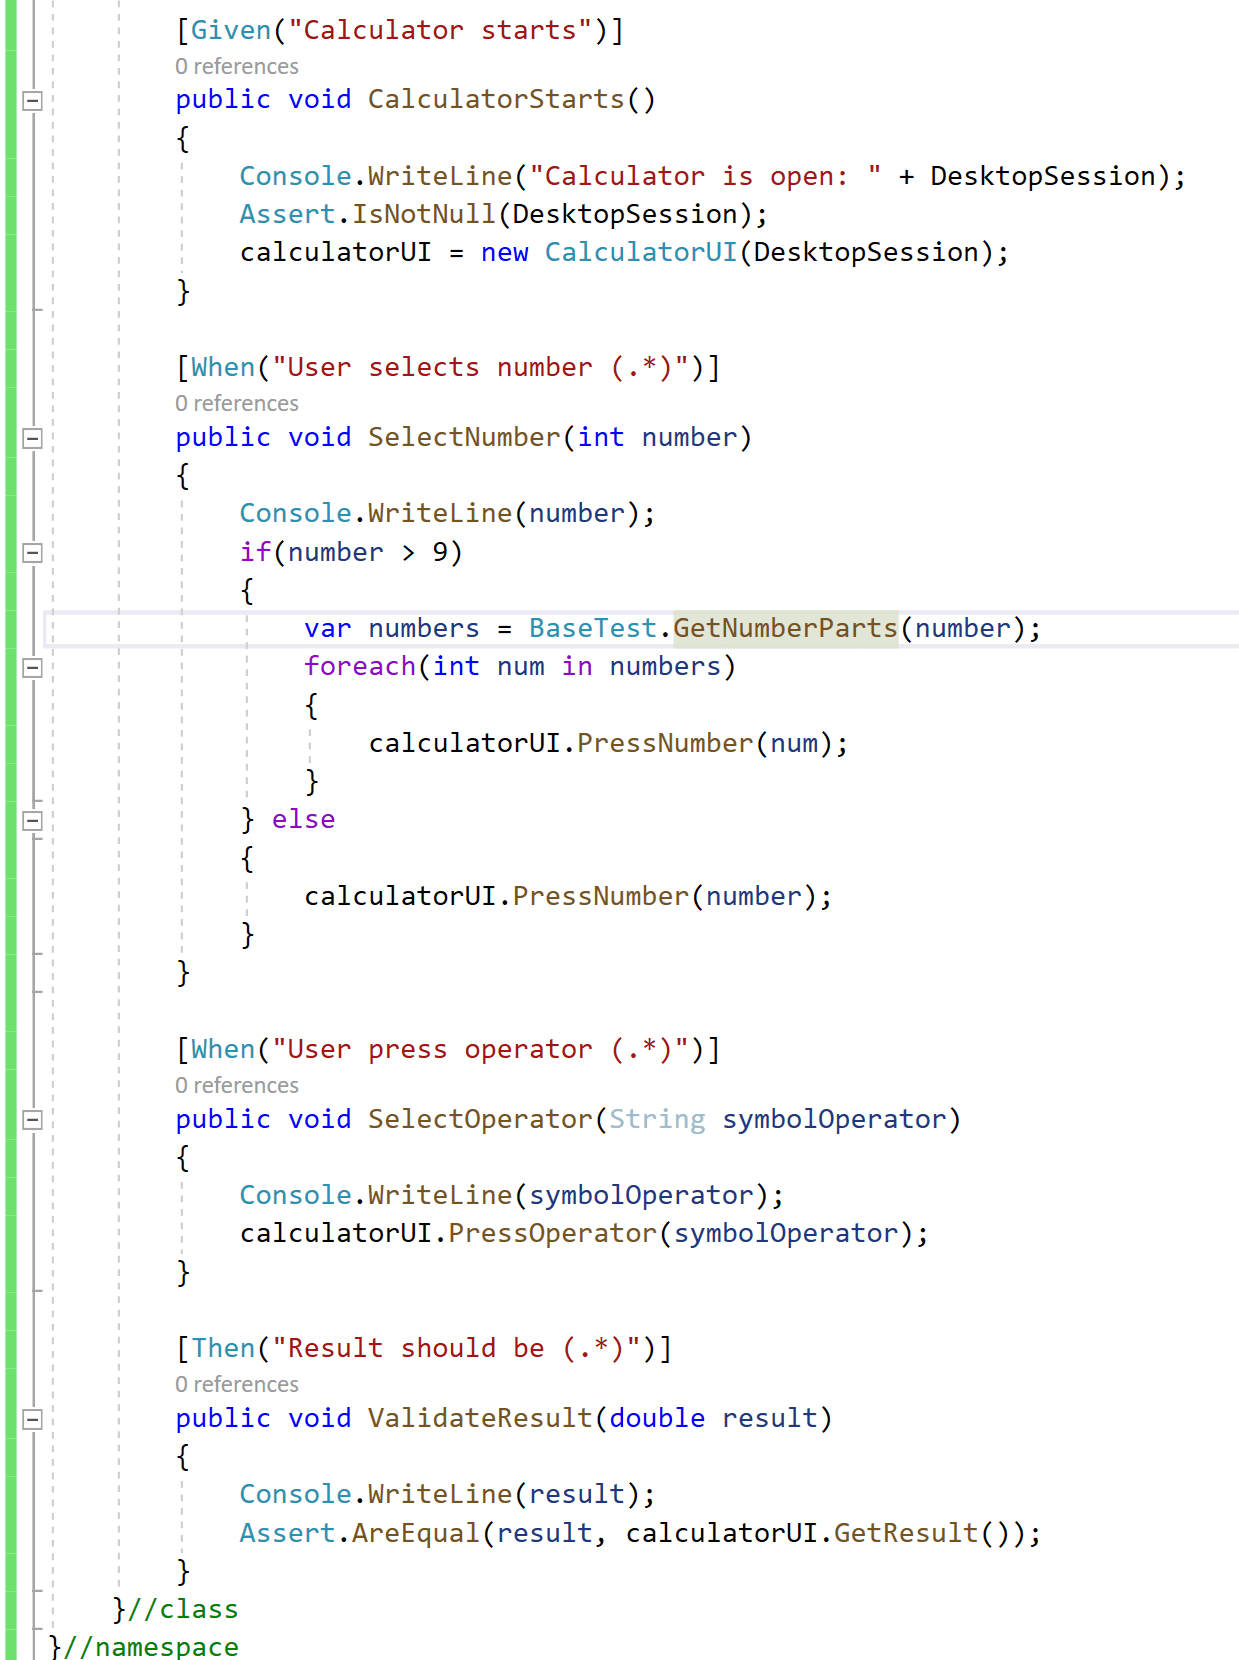
To have a good handle of WinAppDriver Process, WinAppDriver CMD, and the Calculator App, we need to add two basic methods, one is “BeforeScenario” which contains the creation of WinAppDriver Process, CMD, and the opening of the Calculator.
Next, we have “AfterScenario” which contains the Teardown of all these objects, we can also add other actions that we want always to run when a test finishes, like the creation of evidence, upload of results, and so on.
Create the Class “StepsDefinition“ under the folder “Steps Definition“.

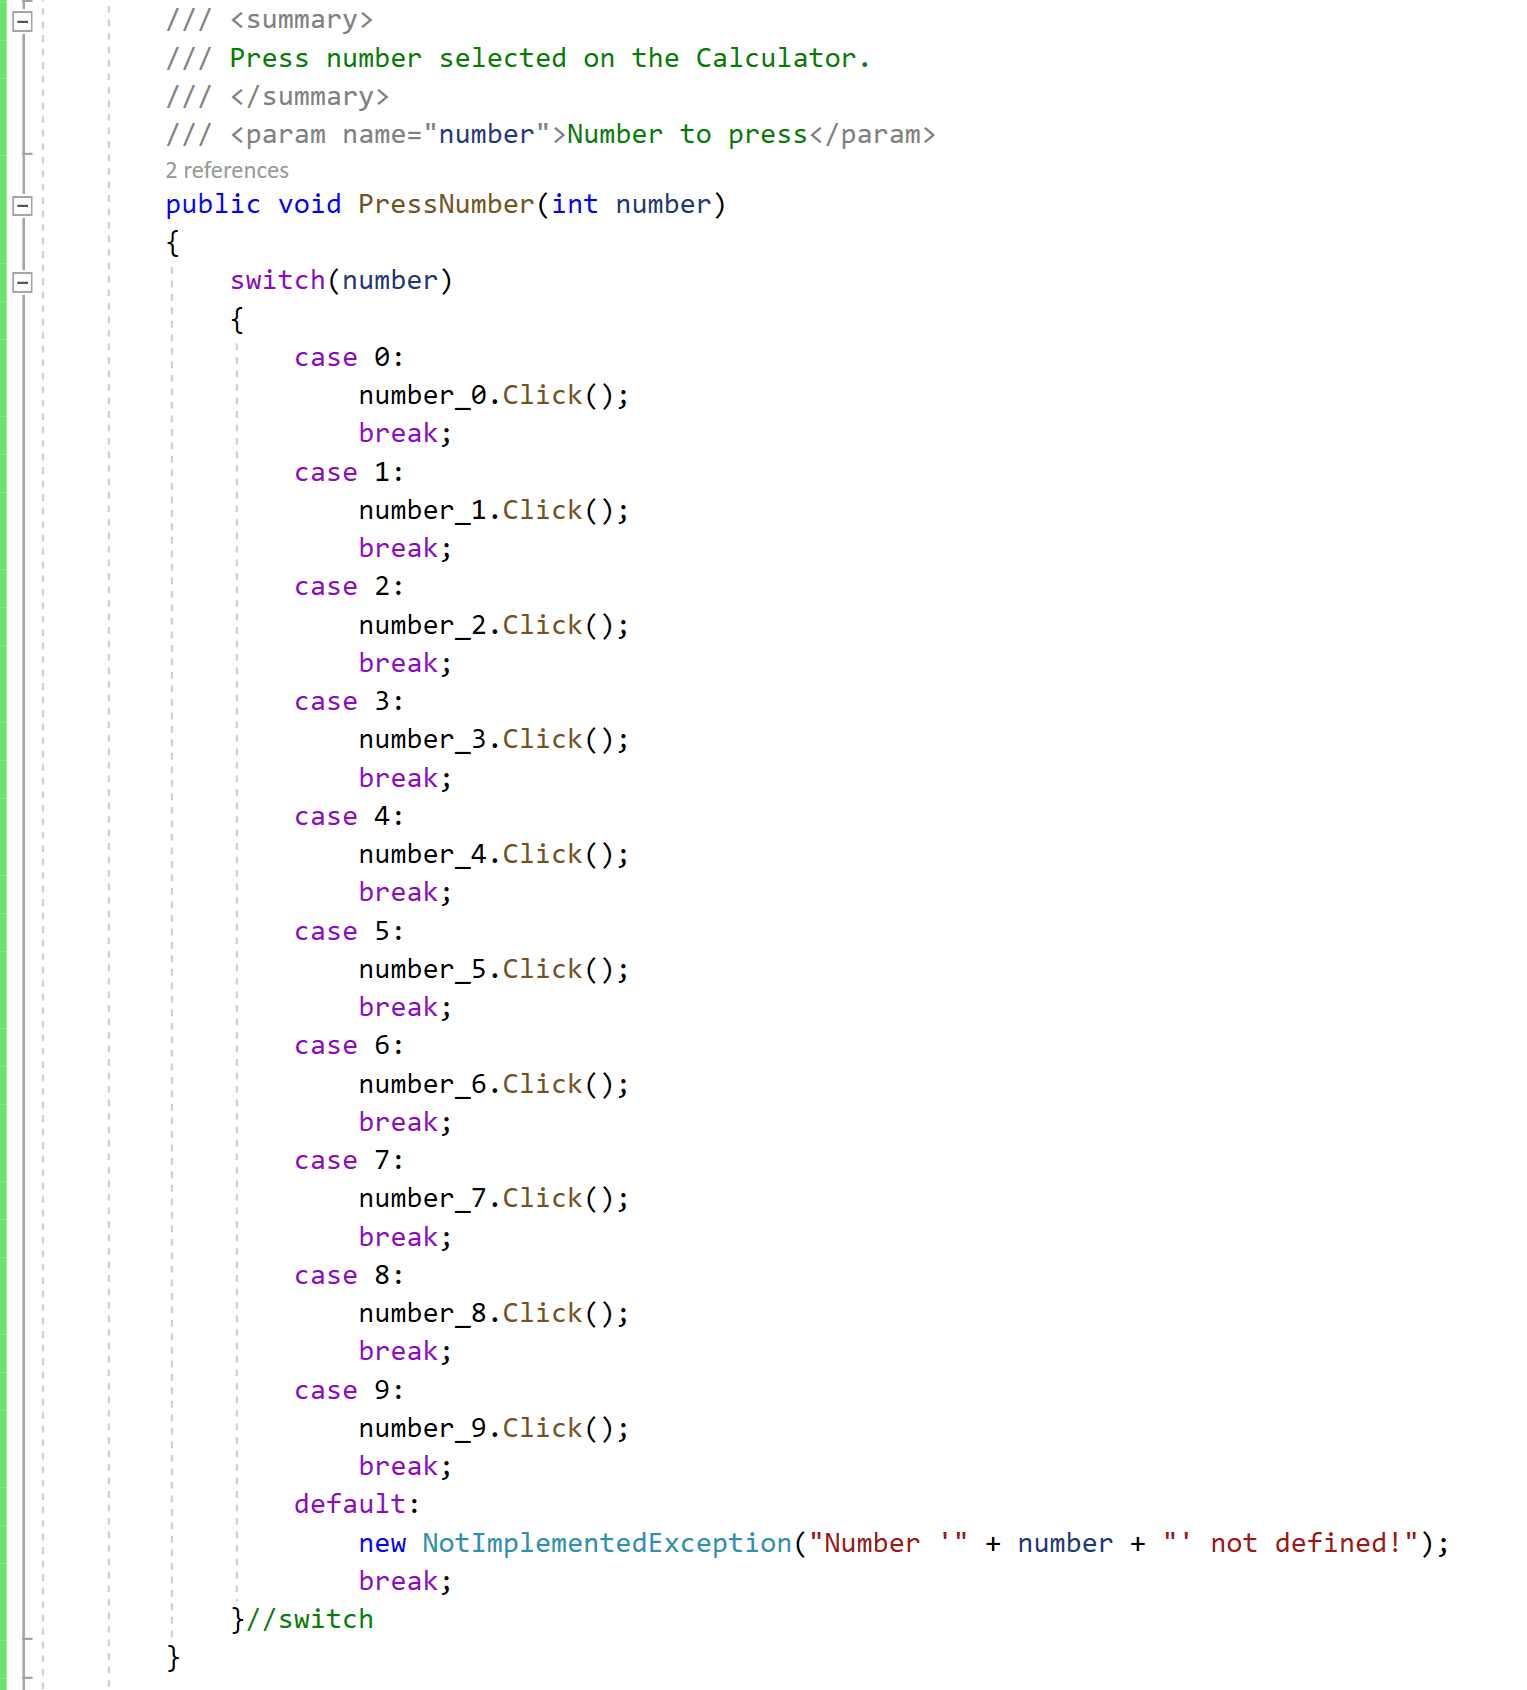
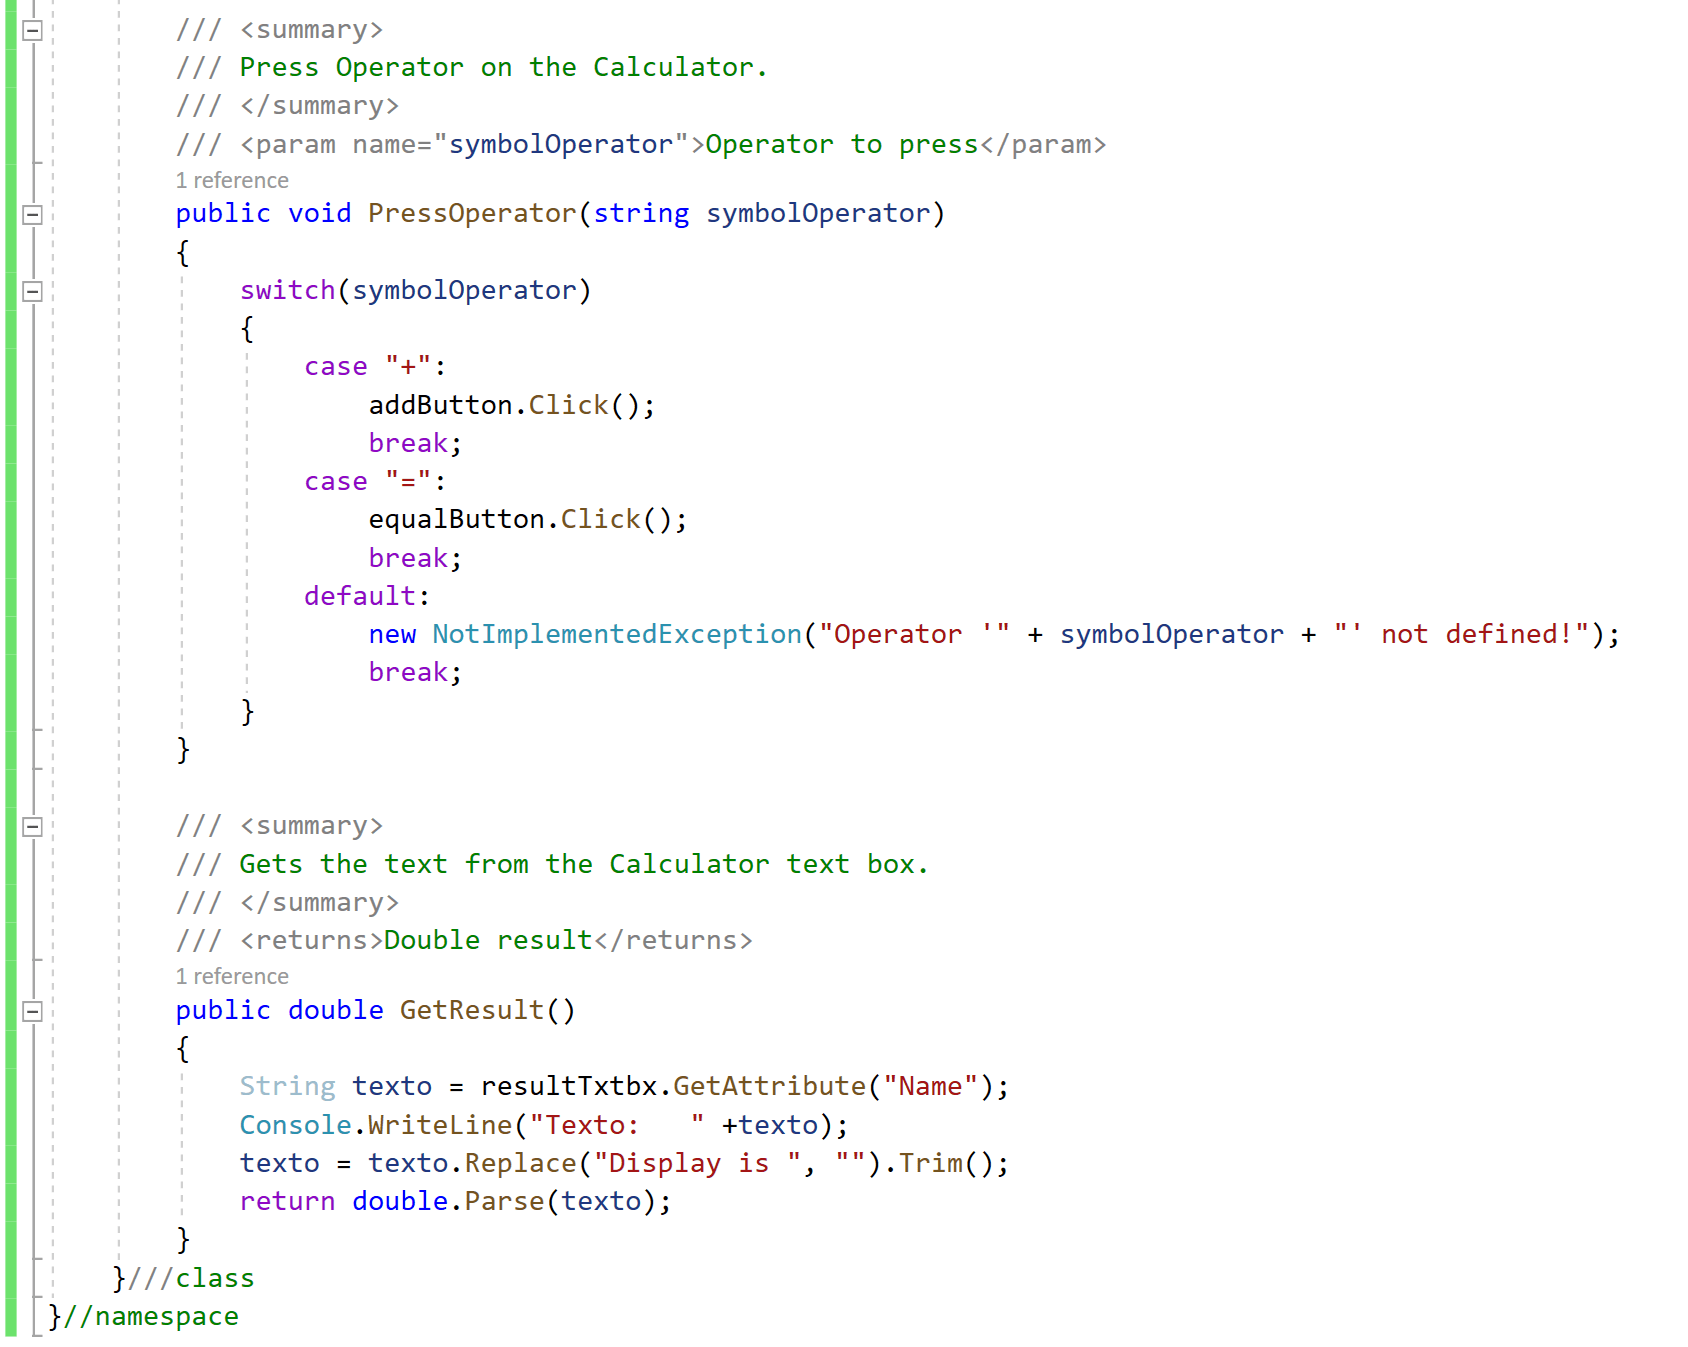
“CalculatorUI“ is a class that will contain all the actions on the UI, like pressing buttons.
Let’s take a look at the “CalculatorUI” class under the folder “UIObjects“.
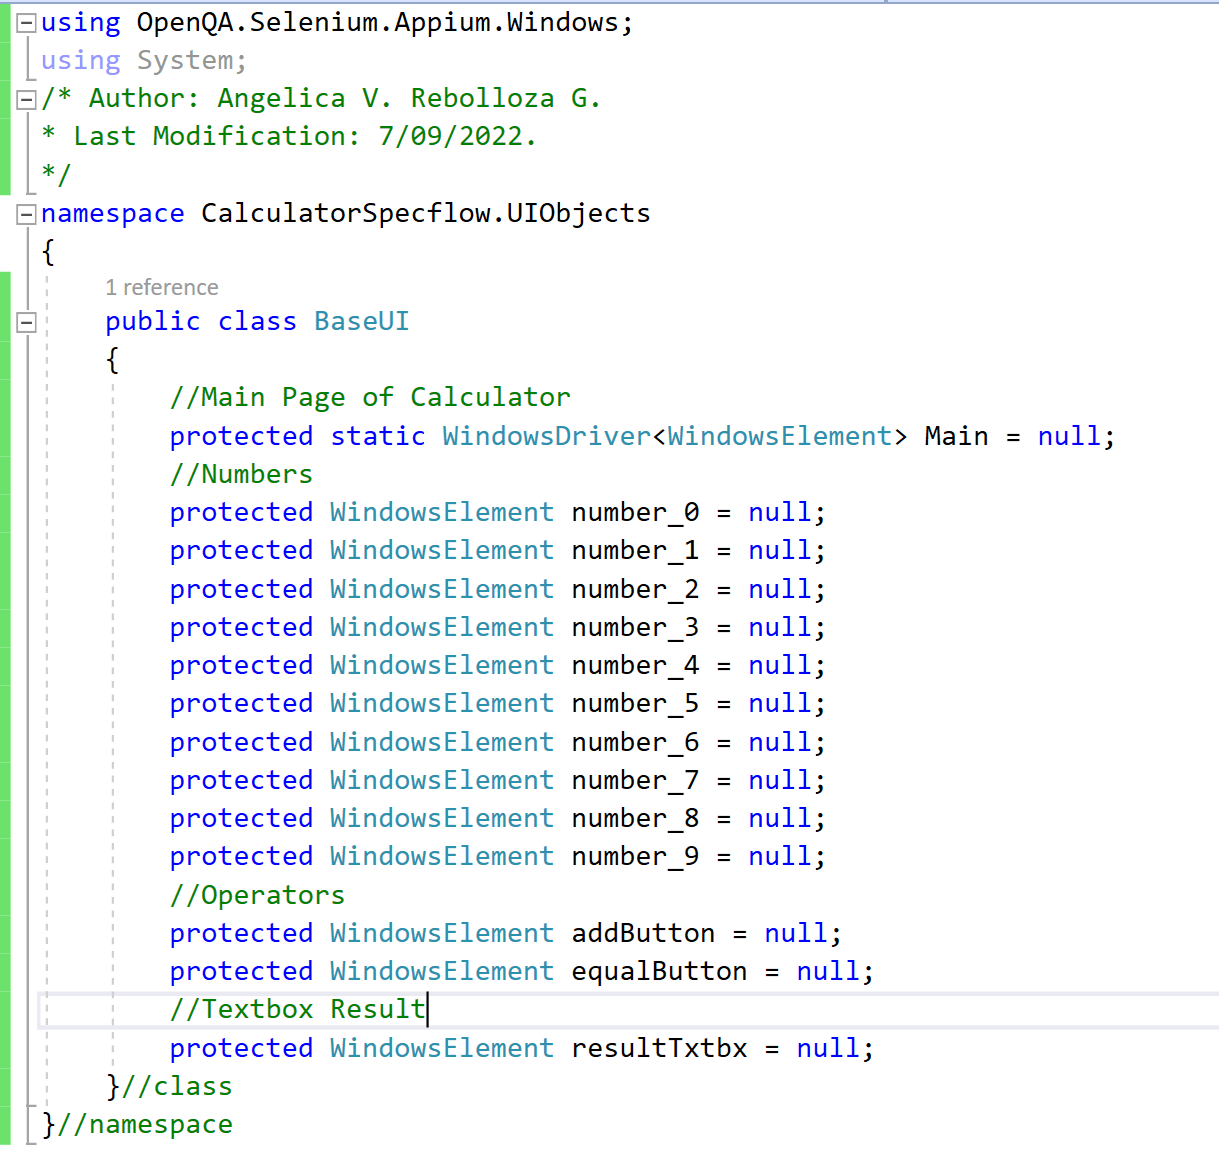
“CalculatorUI“ extends from “BaseUI“, under the same folder “UIObjects“, which contains the definition of all elements used on the Calculator Main Page, and these are initialized in “CalculatorUI“.
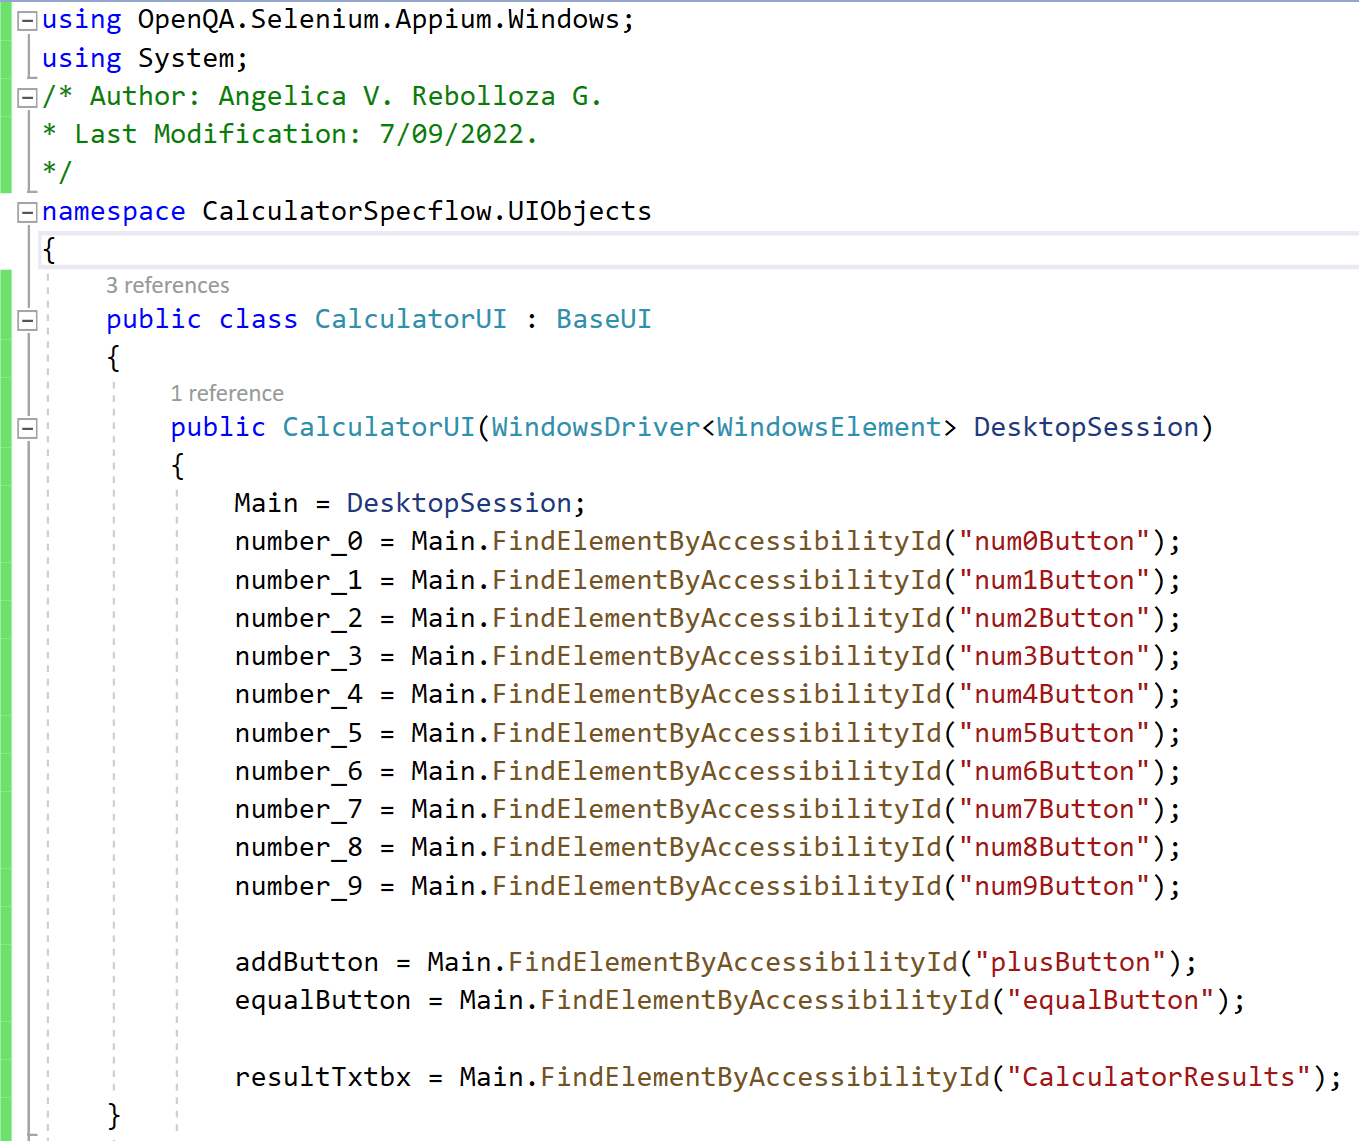
If we review “BaseUI“ it contains the definition of all elements used by “CalculatorUI“.
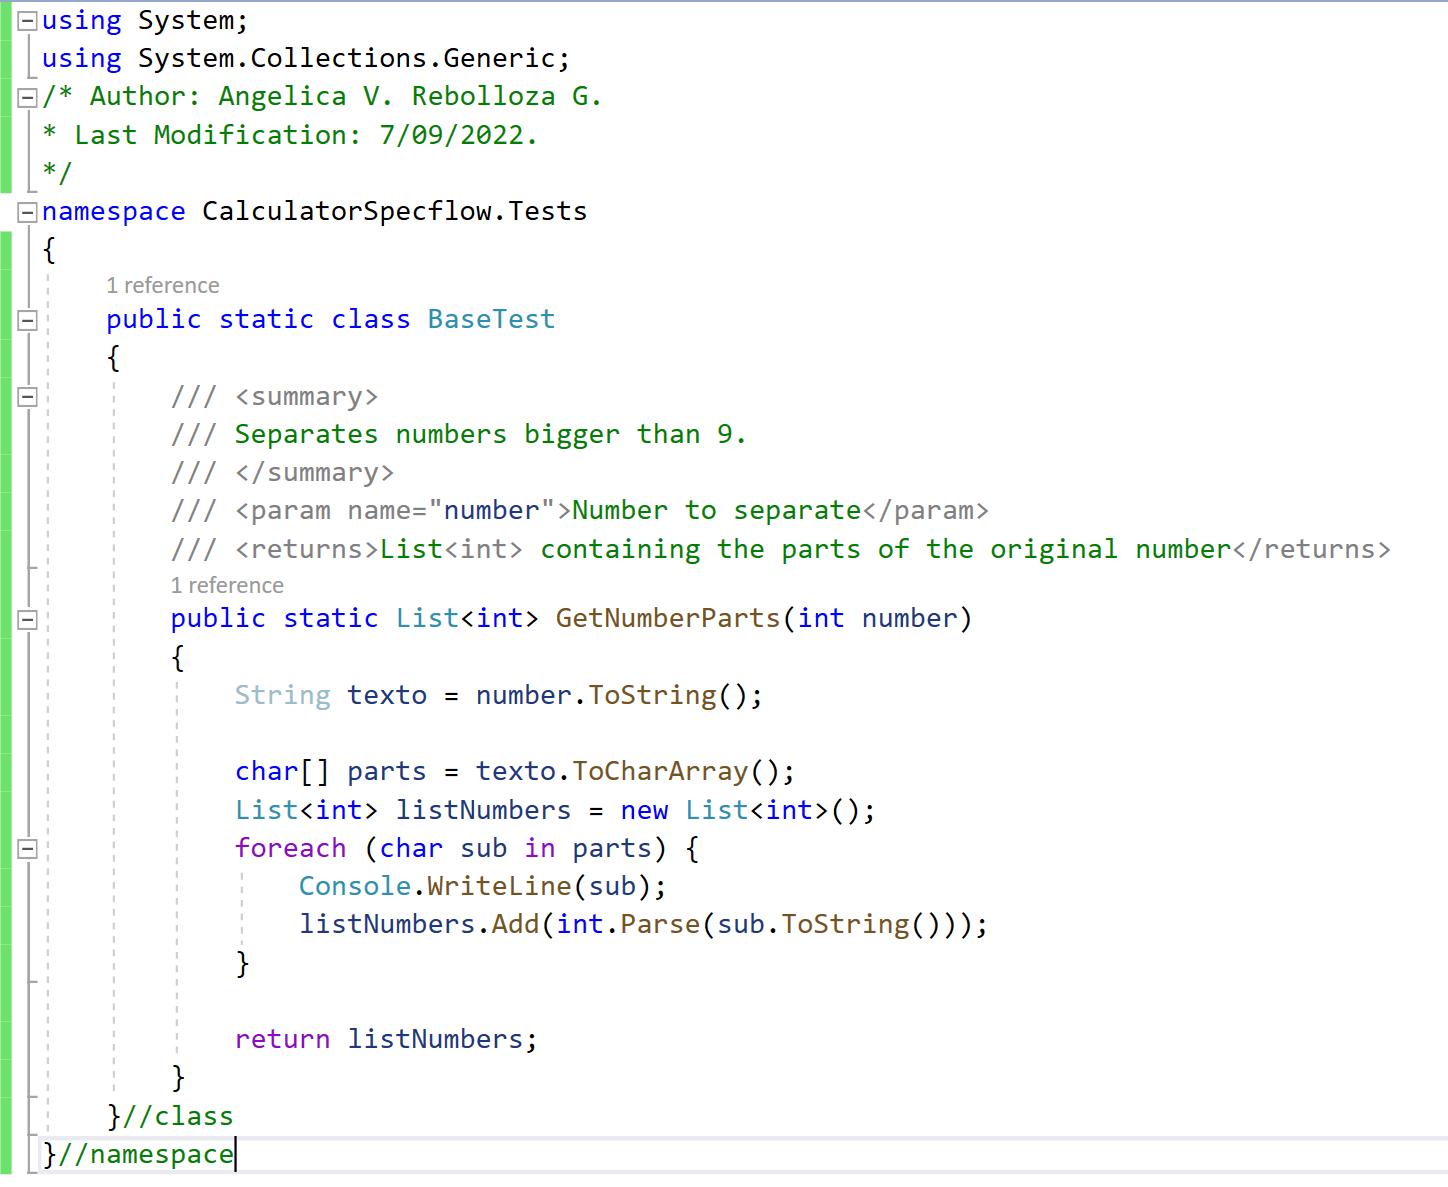
Additionally, to these classes, there is one more class called “BaseTest“, this is a static class that contains extra actions need it, like in this example, contains a special method to separate numbers bigger than 9, to be able to introduce them in the calculator.
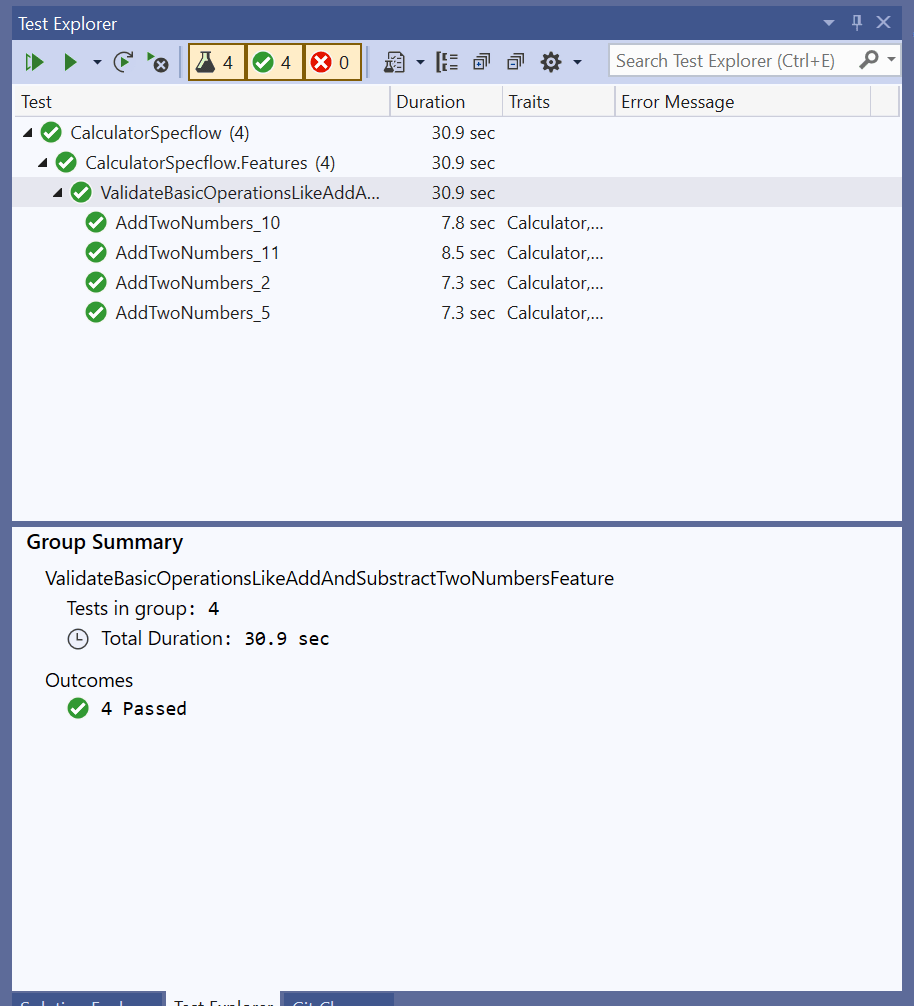
Finally, we can run the test, using “Test Explorer” from Tools in VS.
If you want to download the Project, it is available at Github.
Link of interest:
Automating with Appium – Selenium and TestNG
The Agile Team Approach
The Scrum Team Size
Speed Up Android Testing with TestProject Agent

Angélica Viridiana Rebolloza
Computing Engineer specialized in Automation, working with different tools for Mobile and Web, using languages, tools, and platforms like JAVA, VBScript, JavaScript, C#, Appium, Protractor, UFT (QTP), Selenium, WinAppDriver, Jenkins among others.
Viridiana also has been working using practices like TDD & BDD under Cascade and Agile approaches.
Some certifications include: ISTQB Foundations Certification, SeU Selenium Certified, ITIL Foundations Certification.


